
>>

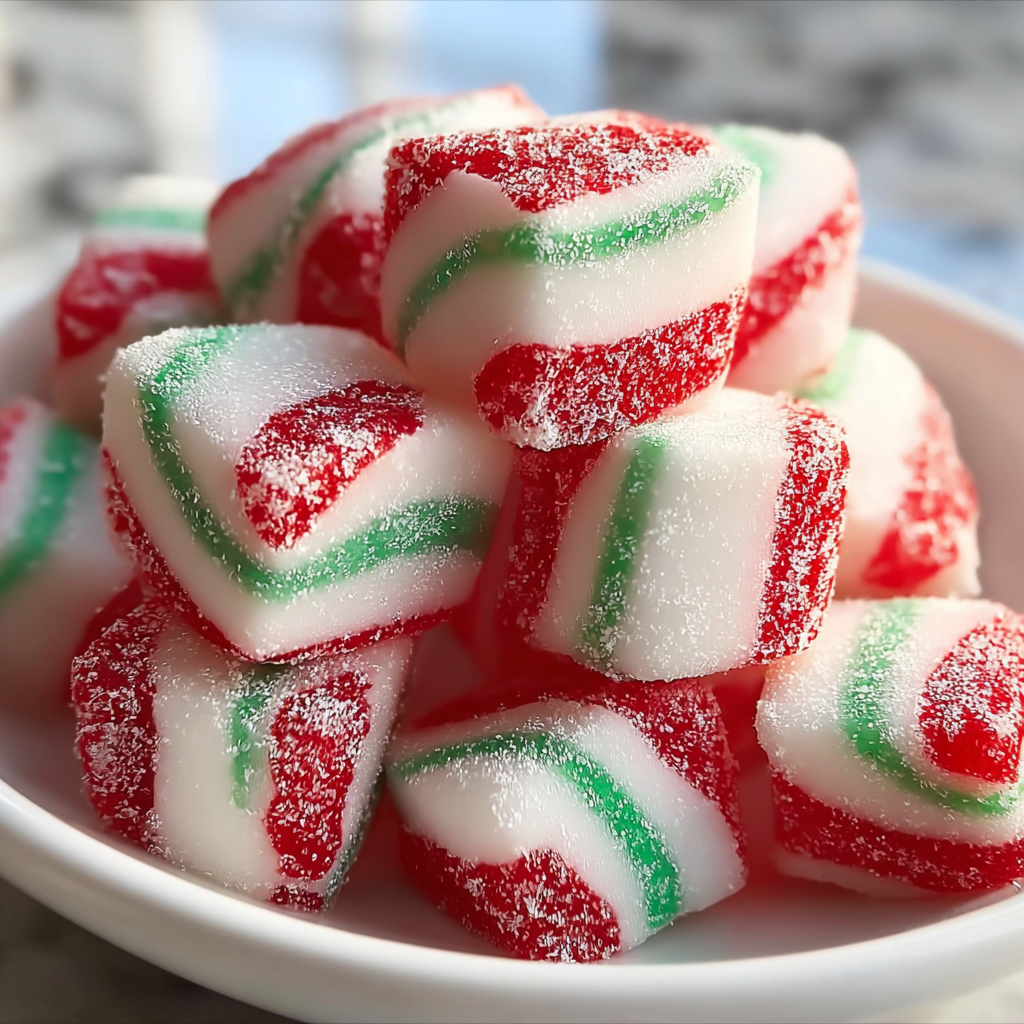
Soft, chewy peppermint discs swirled in festive red and green. A nostalgic holiday candy made with sweetened condensed milk and powdered sugar, perfect for gifting and cookie trays.
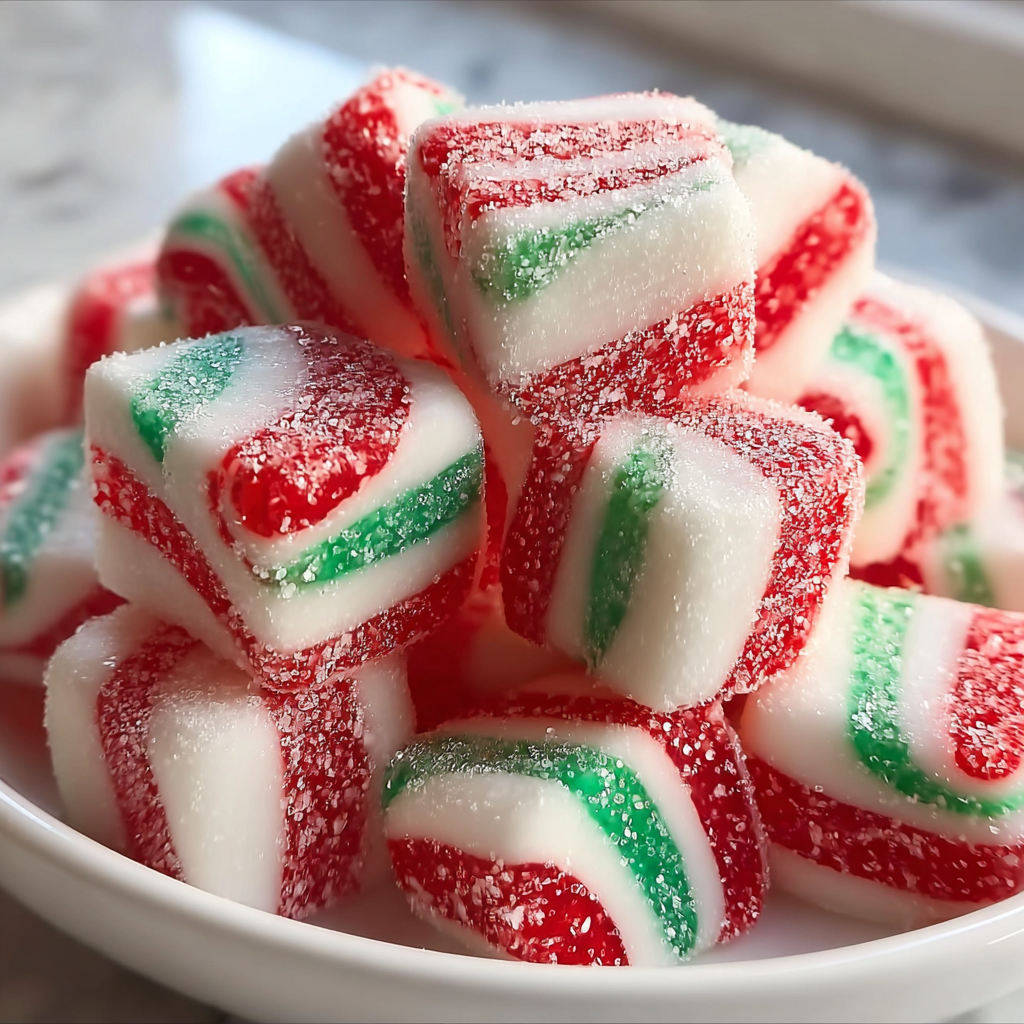
This batch of soft Christmas peppermints is the recipe I reach for every December when the house fills with cinnamon and pine. I first discovered this formula at a small holiday market where a vendor handed me a tiny, pillowy peppermint and I was instantly transported back to childhood afternoons spent stirring candy with my grandmother. These candies are soft rather than hard which makes them perfect for little ones and for tucking into tins to give to neighbors. The texture is tender yet holds a clean peppermint snap when you bite in.
The flavor is bright peppermint with just enough sweetness to make them feel indulgent without coating your teeth. The dough is forgiving so you can color and shape by hand and the process becomes meditative once you start rolling the ropes and twisting the colors together. I love that they require no cooking or specialized equipment so they are accessible for cooks who have never made candy before. They dry at room temperature which gives ample time for conversation, tree trimming, or movie watching while they set.
When I first made these, my family gathered around the kitchen island and each claimed a favorite color. My nephew wore red sugar on his sleeve and declared them the best treat ever. Over the years I refined the peppermint extract amount so the cooling menthol hits just right without overpowering the condensed milk sweetness.

My favorite aspect is the simplicity which makes the process feel almost ceremonial. A pot of tea and a holiday playlist are all you need. Guests often ask for the recipe because they remember the soft texture more than the bright colors.
Place the set candies in a shallow airtight tin lined with parchment paper separating layers with additional parchment to prevent sticking. Keep at room temperature away from direct sunlight and heat sources. In moderate humidity you may wish to store them with a small sachet of rice in a breathable fabric bag nearby to absorb excess moisture. For longer storage freeze in a sealed freezer safe container for up to three months. Thaw at room temperature for one to two hours before unsealing to avoid moisture settling on the sugar coating which would make the surface tacky.
If you need a dairy free variation try a sweetened coconut condensed milk alternative. Expect the flavor to be slightly coconut forward and the texture a touch softer. For a lighter mint aroma reduce the peppermint extract to one quarter teaspoon. If you prefer a firmer candy increase the powdered sugar by two to four tablespoons but note the sweetness will intensify. Natural plant based food colors can be used though they often produce more muted shades and may require a little additional kneading to distribute fully.
Serve the peppermints on a decorative platter mixed with other holiday treats such as spiced nuts and chocolate covered pretzels. They make an elegant addition to a dessert table when tucked into small paper candy cups. For a tea service pair with black tea or a mild green tea so the peppermint does not overwhelm the beverage. These also travel well in small gift tins tied with ribbon for hostess gifts and neighbor presents.
Peppermint candies have long been associated with winter celebrations in many Western countries. The classic candy cane evolved from early minted sweets and later became a decorative symbol of the season. These soft discs are a modern home candy adaptation that prioritizes texture and ease over the hard boiled variety. Making them by hand links a cook to older traditions of holiday candy making where shaping and sharing was part of family ritual.
For a winter twist add a pinch of finely grated orange zest to one color for a citrus note that complements peppermint. In summer swap peppermint extract for spearmint or a drop of vanilla for a softer flavor. For holiday parties add a dusting of edible glitter or finely crushed candy canes on top of the granulated sugar for shimmer and crunch. To adapt for Christmas cookie exchanges use smaller rounds to create bite sized pieces that fit neatly in candy tins.
Make the base dough in the morning and refrigerate for a short time if you need to free up your schedule; bring it back to room temperature before coloring and rolling. Work in small batches when rolling ropes to maintain an even thickness. Use a ruler or your finger as a guide for consistent two inch cuts. Prepare several sheets of parchment so you can stage finished candies on multiple trays and rotate them as they dry to maximize airflow and reduce total set time.
When you are ready to share these, wrap small stacks in wax paper and tie with ribbon for a nostalgic presentation that recalls old fashioned candy shops. I hope these soft Christmas peppermints find a permanent spot on your holiday table and become a tradition in your home.
Sift the powdered sugar to remove lumps for a smooth dough.
Knead food coloring gently and wear gloves to avoid stained hands.
If dough is too sticky add powdered sugar one tablespoon at a time.
Dry candies overnight in low humidity for the best texture.
This nourishing soft christmas peppermints recipe is sure to be a staple in your kitchen. Enjoy every moist, high protein slice — it is perfect for breakfast or as a wholesome snack any time.
Store at room temperature in an airtight container for up to one week. They freeze well for up to three months.
Yes use dairy free sweetened condensed milk alternatives though the flavor will change slightly and texture may be softer.
This Soft Christmas Peppermints recipe makes perfectly juicy, tender, and flavorful steak every time! Serve with potatoes and a side salad for an unforgettable dinner in under 30 minutes.
Sift 3 3/4 cups powdered sugar into a large bowl and reserve a small amount for dusting the work surface to ensure a smooth dough.
Add 1/3 cup sweetened condensed milk and 1/2 teaspoon peppermint extract to the sifted sugar and mix until a sticky dough forms. Adjust with additional sugar if too wet.
Split the dough into three portions, leave one plain and color the other two with gel food coloring. Knead until color is uniform and dough is pliable.
Dust the surface and roll each portion into 1/2 inch thick ropes. Lay them side by side and twist gently to create a candy cane effect.
Cut into 2 inch segments and shape into small rounds or discs by pressing lightly between palms. Smooth edges as needed.
Roll each piece in granulated sugar, place on parchment and let dry at room temperature for several hours or overnight until firm.
Last Step: Please leave a rating and comment letting us know how you liked this recipe! This helps our business to thrive and continue providing free, high-quality recipes for you.
Leave a comment & rating below or tag
@aiolirecipe on social media!

A cozy, colorful salad that celebrates autumn flavors — roasted butternut squash and Brussels sprouts tossed with pasta, cranberries, pecans, and tangy feta, finished with a balsamic vinaigrette.

Bright, tangy cilantro-lime marinated flank steak served over rice with black beans, corn, fresh veggies and creamy avocado for a fast, healthy weeknight bowl.

Buttery crescent rolls filled with a sweet pecan pie–inspired filling — a quick, crowd-pleasing dessert perfect for holidays or weeknight cravings.
Leave a comment & rating below or tag @aiolirecipe on social media!
Enjoyed this recipe? Share it with friends and family, and don't forget to leave a review!
This recipe looks amazing! Can't wait to try it.
Comments are stored locally in your browser. Server comments are displayed alongside your local comments.
Join to receive our email series which contains a round-up of some of our quick and easy family favorite recipes.
