
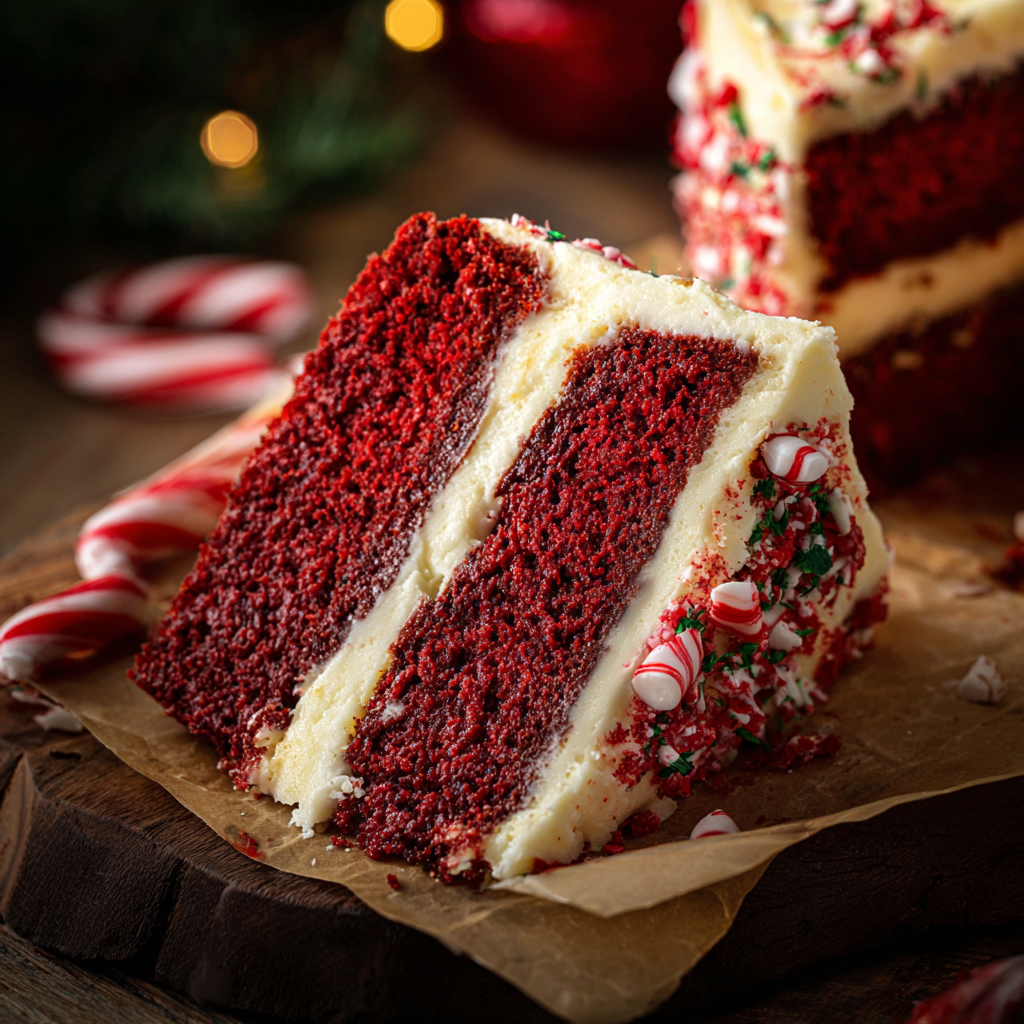
Red Velvet Christmas Cake with Cheesecake Swirl and Cream Cheese Frosting

A festive layered red velvet cake with a creamy cheesecake swirl and cloud-like cream cheese frosting—perfect for holiday gatherings and show-stopping slices.
Why You'll Love This Recipe
- Combines two classic favorites: a cocoa-tinged red velvet base and a rich, tangy cheesecake layer for a contrast of textures and flavors that delights every palate.
- Uses pantry-friendly ingredients like all-purpose flour, cocoa, and basic dairy staples—no obscure items required, making it accessible for home bakers.
- Relatively hands-on time is modest: active prep is around 40 minutes, with straightforward mixing and assembly suitable for a holiday schedule.
- Make-ahead friendly: layers chill in the fridge and can be wrapped and frozen, which helps with hosting and last-minute assembly.
- Decorates beautifully: smooth cream cheese frosting accepts piping and festive toppings like sugared cranberries, edible gold leaf, or toasted pecans.
I remember the first time I brought this to a family gathering: neighbors asked for the recipe, and my aunt claimed it was the best red velvet she’d ever eaten. That reaction is common—people appreciate familiar flavors presented in a slightly elevated way. Over the years I’ve adjusted the egg and dairy temperatures, learned the timing for the cheesecake swirl, and refined the frosting texture so slices stay neat. This combination is both crowd-pleasing and worth the slightly extra step of adding a cheesecake layer.
Ingredients
- Cheesecake layer: 12 oz cream cheese (room temperature), 1/4 cup granulated sugar, 1 tbsp all-purpose flour, 1 tsp vanilla, 1 large egg—flour stabilizes the filling and full-fat cream cheese gives a silkier texture.
- Dry cake mix: 3 cups all-purpose flour and 1/4 cup unsweetened cocoa powder (Dutch-process recommended)—Dutch-process cocoa deepens color and softens acidity for classic red velvet character.
- Leavening and salt: 2 tsp baking powder, 1 tsp baking soda, 1 tsp salt—these create an even rise while the baking soda interacts with the vinegar for lift and tenderness.
- Wet cake ingredients: 1 cup canola or vegetable oil, 1 1/2 cups granulated sugar, 1 tsp white vinegar, 1 tsp vanilla, 3 large eggs—oil keeps the crumb moist for days; use neutral oil like canola.
- Dairy and color: 3/4 cup sour cream or Greek yogurt, 1 cup buttermilk, 1 tsp red gel food coloring—sour cream adds fat and tang, buttermilk reacts with baking soda for a tender crumb, red gel gives intense hue without thinning batter.
- Cream cheese frosting: 1 cup (226 g) unsalted butter, room temperature; 4 oz cream cheese, room temperature; 3 cups powdered sugar, sifted; 1 tsp vanilla—use high-quality butter and full-fat cream cheese for stable, spreadable frosting.
Instructions
Prepare the cheesecake filling: Beat 12 oz room-temperature cream cheese with 1/4 cup granulated sugar until completely smooth. Add 1 tbsp flour and 1 tsp vanilla, then incorporate 1 large room-temperature egg until just combined. Avoid overbeating—too much air causes cracking or a spongy texture. Chill briefly if soft. Mix the dry ingredients: Whisk together 3 cups all-purpose flour, 1/4 cup Dutch-process cocoa, 2 tsp baking powder, 1 tsp baking soda, and 1 tsp salt in a large bowl. Sifting cocoa with flour prevents clumps and ensures even color throughout the batter. Combine wet components: In a second bowl, whisk 1 cup neutral oil with 1 1/2 cups sugar, 1 tsp white vinegar, 1 tsp vanilla, and 3 large eggs until smooth. Alternate adding the dry mixture with 1 cup buttermilk and 3/4 cup sour cream—start and end with the dry mix to avoid overmixing. Fold in 1 tsp red gel food coloring until uniform. Assemble layers: Grease and line three 9-inch round pans (or two pans for a taller cake). Pour a thin layer of red velvet batter into each pan, spoon a ring of cheesecake filling leaving a 1/2-inch gap at the edge, then cover with remaining batter. Tap pans gently on the counter to release air pockets and distribute filling. Bake, cool, and chill: Bake at 350°F (175°C) for 35–45 minutes, until a toothpick comes out with moist crumbs and the top springs back. Let cool in pans 15 minutes, then invert onto racks and cool completely. Chill layers at least 2 hours (or overnight) so the cheesecake layer firms before frosting. Frost and finish: Beat 1 cup (226 g) unsalted butter and 4 oz cream cheese until fluffy. Gradually add 3 cups sifted powdered sugar and 1 tsp vanilla, adjusting for consistency with small splashes of milk if needed. Crumb-coat chilled layers, chill 15 minutes, then apply the final coat and decorate as desired.
You Must Know
- Chilling is essential: cold layers result in cleaner frosting lines and prevent cheesecake swirl from shifting when you stack the cake.
- Stability tip: adding 1 tbsp flour to the cheesecake filling prevents weeping and gives a sliceable texture without altering flavor.
- Store covered in the refrigerator for up to 4 days; freeze slices up to 3 months wrapped tightly to retain moisture.
- High altitude adjustments may be necessary: reduce baking powder by 1/4 tsp and bake a few minutes less, watching for doneness.
My favorite aspect is how festive the cake looks when sliced—the marbled cross-section reveals the surprise cheesecake that always makes guests say "wow." One holiday I served this with a simple sugared cranberry garland and everyone asked for seconds. The balance of sweet, tang, and cocoa is what keeps people coming back, and the methodical chilling makes assembly predictable for even a busy host.
Storage Tips
Store the cake well-covered in the refrigerator to preserve the cream cheese components. For short-term storage, place the frosted cake in a cake carrier or cover loosely with a large bowl to prevent condensation from forming on the frosting. Ideal refrigerator time is up to 4 days; beyond that the crumb begins to dry. For longer storage, slice and wrap individual portions in plastic wrap, then aluminum foil, and freeze up to 3 months. To serve frozen slices, thaw in the refrigerator overnight to retain texture and avoid sogginess.

Ingredient Substitutions
If you need to adapt ingredients, swap sour cream for full-fat Greek yogurt in a 1:1 ratio for similar tang and moisture. For buttermilk, make a quick substitute by adding 1 tbsp white vinegar to just under 1 cup milk and letting it sit 5 minutes. If you prefer less oil, replace up to half the oil with melted butter for a richer flavor, but expect a slightly firmer crumb. For a natural red hue, beet powder can be used, though it changes the flavor and yields a subtler color—use about 1 to 1 1/2 tsp concentrated powder.
Serving Suggestions
This cake is a showpiece for holiday dessert tables—serve slices with lightly sweetened whipped cream or a drizzle of dark chocolate ganache for an upscale touch. Garnish with sugared cranberries and fresh rosemary sprigs to emphasize the Christmas theme. It pairs well with strong coffee, espresso, or a glass of port. For a lighter after-dinner option, serve smaller slices alongside a citrus sorbet to cut the richness and refresh the palate.
Cultural Background
Red velvet evolved in American baking as a variation of classic chocolate cake, prized for its smooth crumb and distinctive coloring that became associated with southern hospitality. The tang of buttermilk and slight cocoa echo its traditional profile, while adding a cheesecake layer blends two beloved textures. Over decades, red velvet has shifted from a simple sheet cake to elaborate layer creations, especially popular at celebratory gatherings where dramatic color and indulgent flavors make a statement.
Seasonal Adaptations
For winter, incorporate warming spices like a pinch of cinnamon or allspice in the batter to complement holiday flavors. In summer, lighten the frosting with whipped cream cheese (whipped heavy cream folded into the frosting) for an airier finish and top with macerated berries. For Thanksgiving, swap sugared cranberries for toasted pecans and a drizzle of caramel. These small changes let the recipe adapt to the season without losing its core identity.
Meal Prep Tips
Break down the process across two days to reduce stress: bake and chill the layers one day, and prepare frosting plus final assembly the next. Label wrapped layers to avoid mix-ups and use 9-inch cardboard cake circles between layers for safe stacking if transporting. Keep frosting at piping consistency by chilling briefly if it becomes too loose; re-whip for a few seconds to regain structure. Use airtight containers for leftover slices and glass containers for reheating single portions in a low oven to refresh texture.
Making this cake is both a ritual and a joy—an elevated classic that rewards patience with memorable presentation and comforting flavors. I encourage you to make it your own with decorations that reflect your holiday table and to enjoy the smiles that come with each slice.
Pro Tips
Warm eggs and dairy to room temperature to ensure a smooth emulsion and even rise.
Chill layers thoroughly before frosting to prevent sliding and to get clean, sharp slices.
Sift cocoa and powdered sugar to remove lumps and promote even texture in batter and frosting.
Use gel food coloring for richer color without thinning the batter.
Add a tablespoon of flour to cheesecake filling to stabilize and prevent weeping.
This nourishing red velvet christmas cake with cheesecake swirl and cream cheese frosting recipe is sure to be a staple in your kitchen. Enjoy every moist, high protein slice — it is perfect for breakfast or as a wholesome snack any time.
FAQs about Recipes
Can I make this ahead and freeze it?
Yes. Slices can be individually wrapped and frozen for up to 3 months; thaw overnight in the refrigerator before serving.
Why should ingredients be at room temperature?
Use room-temperature dairy and eggs so ingredients emulsify evenly; cold ingredients can make batter lumpy or cause the cheesecake to curdle.
How do I prevent the cheesecake layer from cracking?
If the center rises too much and cracks, it was likely overmixed or baked too long—reduce mixing and keep an eye on internal doneness, removing when a toothpick shows moist crumbs.
Tags
Red Velvet Christmas Cake with Cheesecake Swirl and Cream Cheese Frosting
This Red Velvet Christmas Cake with Cheesecake Swirl and Cream Cheese Frosting recipe makes perfectly juicy, tender, and flavorful steak every time! Serve with potatoes and a side salad for an unforgettable dinner in under 30 minutes.
Ingredients
Cheesecake Layer
Red Velvet Cake
Cream Cheese Frosting
Instructions
Prepare the cheesecake filling
Beat cream cheese with sugar until smooth. Add flour and vanilla, then beat in the egg until just combined. Do not overbeat to avoid excess air; chill briefly if mixture becomes too soft.
Mix dry and wet cake ingredients
Whisk flour, cocoa, baking powder, baking soda, and salt. In another bowl combine oil, sugar, vinegar, vanilla, and eggs. Alternate adding dry mix with buttermilk and sour cream, folding gently to avoid overmixing.
Assemble the pans
Grease and line pans. Pour a portion of batter into each pan, spoon the cheesecake filling leaving a 1/2-inch gap from edges, then cover with remaining batter. Tap pans to remove air pockets.
Bake and cool
Bake at 350°F for 35–45 minutes until a toothpick shows moist crumbs and tops spring back. Cool in pans 15 minutes, then transfer to racks. Chill layers thoroughly before frosting.
Frost and finish
Beat butter and cream cheese until fluffy, add powdered sugar and vanilla and adjust consistency. Crumb-coat chilled layers, chill 15 minutes, then apply final frosting and decorate as desired.
Last Step: Please leave a rating and comment letting us know how you liked this recipe! This helps our business to thrive and continue providing free, high-quality recipes for you.
Nutrition
Did You Make This?
Leave a comment & rating below or tag
@aiolirecipe on social media!
Categories:
You might also like...

Fall Harvest Pasta Salad
A cozy, colorful salad that celebrates autumn flavors — roasted butternut squash and Brussels sprouts tossed with pasta, cranberries, pecans, and tangy feta, finished with a balsamic vinaigrette.

Cilantro Lime Steak Bowls
Bright, tangy cilantro-lime marinated flank steak served over rice with black beans, corn, fresh veggies and creamy avocado for a fast, healthy weeknight bowl.

Pecan Pie Crescent Rolls
Buttery crescent rolls filled with a sweet pecan pie–inspired filling — a quick, crowd-pleasing dessert perfect for holidays or weeknight cravings.
Did You Make This?
Leave a comment & rating below or tag @aiolirecipe on social media!
Rate This Recipe
Share This Recipe
Enjoyed this recipe? Share it with friends and family, and don't forget to leave a review!
Comments (1)
This recipe looks amazing! Can't wait to try it.
Comments are stored locally in your browser. Server comments are displayed alongside your local comments.
Hi, I'm Olivia!
What's Popular

30-Minute Meals!
Join to receive our email series which contains a round-up of some of our quick and easy family favorite recipes.