
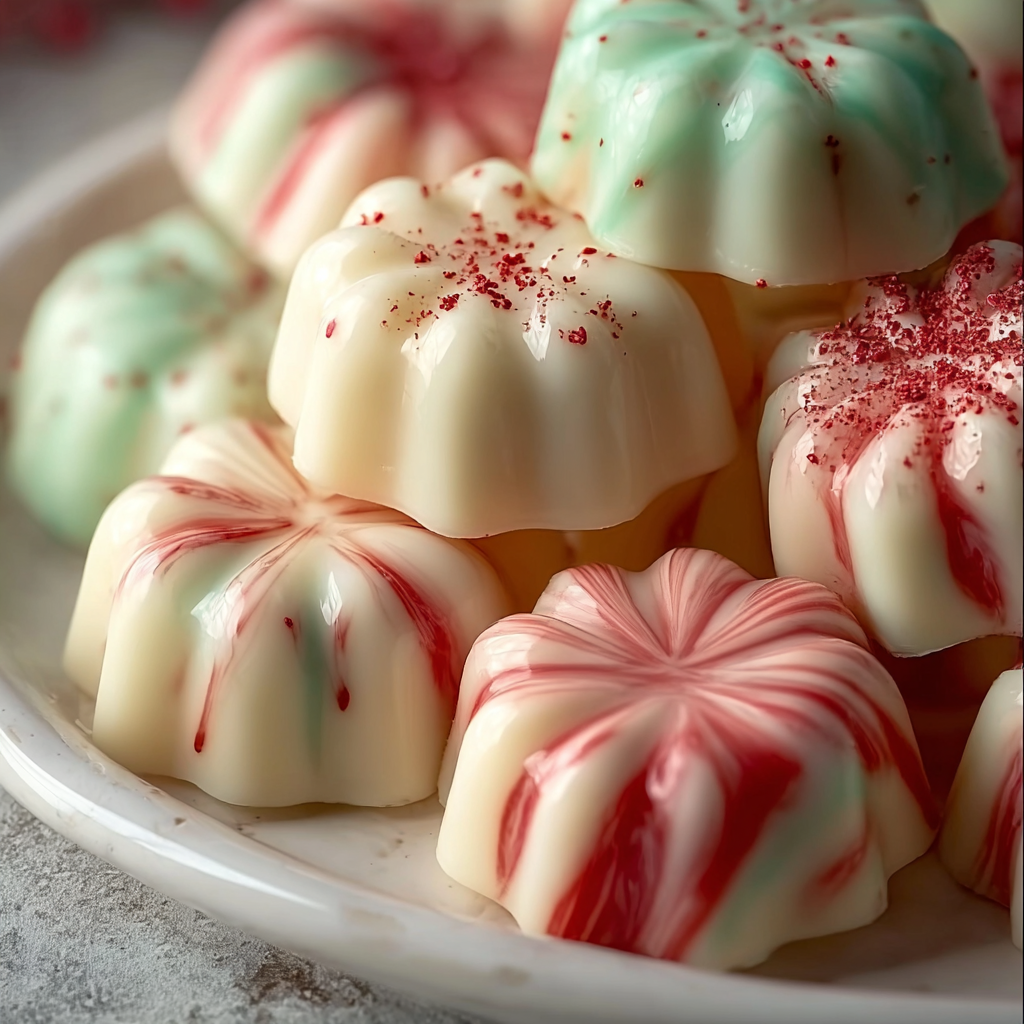
Old-Fashioned Butter Mints

Soft, melt-in-your-mouth butter mints flavored with peppermint — a nostalgic, no-bake treat that's perfect for holidays, gift jars, and afternoon tea.
Why You'll Love This Recipe
- The ingredient list is tiny and uses pantry staples: unsalted butter, powdered sugar, cream or milk, and a dash of peppermint extract — ready in about 30 minutes of hands-on time.
- There is no cooking or candy thermometer required, making it ideal for beginners or for cooks who want a no-fuss sweet to make with kids.
- These keep well at room temperature for a few days and can be made a day ahead for parties or wrapped as charming gifts in small jars or cello bags.
- Gel food coloring provides vivid hues without thinning the mixture, so you preserve the perfect texture while customizing colors for holidays or themes.
- The final texture is tender and slightly creamy — a meltaway center that contrasts nicely with firmer pressed or piped edges when shaped.
- A small amount of heavy cream or whole milk gives the candies a silkier mouthfeel; omit it minimally and expect a slightly drier, sandier texture.
I still remember the first time I handed a jar of these to a neighbor during a snowstorm; she held up a mint between thumb and forefinger and smiled with that slow, delighted look that tells you a recipe has landed just right. My family now expects a batch at holiday gatherings, and experimenting with tiny color combinations has become a little ritual — peppermint pinks and pale greens for spring, classic white with pale red flecks for Christmas.
Ingredients
- Unsalted butter: Use 1/2 cup (1 stick) softened to room temperature so it creams smoothly. I prefer a European-style butter for a slightly richer flavor, but any good-quality unsalted brand works; avoid margarine.
- Powdered sugar: 4 cups (confectioners' sugar), sifted to prevent lumps. This provides structure and the melt-in-your-mouth quality. Use a finely milled brand for the smoothest dough.
- Heavy cream or milk: 1 tablespoon. Heavy cream yields the creamiest mouthfeel; whole milk is a fine, slightly lighter substitute. Add by tablespoon to control consistency.
- Peppermint extract: 1/2 teaspoon. Use a pure peppermint extract for the cleanest, brightest flavor — pure peppermint oil extracts deliver sharper menthol notes than imitation extracts.
- Salt: A pinch of fine salt balances the sweetness and lifts the butter flavor. Do not skip it.
- Gel food coloring (optional): Small amounts kneaded into the dough create festive pastel or vivid hues without changing texture. Liquid food coloring will make the mixture sticky, so stick to gel.
Instructions
Beat the butter until creamy: Place 1/2 cup softened unsalted butter in a large mixing bowl. Using an electric mixer on medium speed, beat for about 2 minutes until the butter is pale and smooth. Scrape down the sides to ensure even creaming; the goal is to eliminate any lumps and incorporate some air for a lighter mouthfeel. Add extract, salt, and cream: Add 1/2 teaspoon peppermint extract, one pinch of salt, and 1 tablespoon heavy cream or milk. Mix on low-medium until combined. The liquid should be fully incorporated before you add the sugar so the powdered sugar hydrates evenly. Incorporate powdered sugar: With the mixer on low, gradually add 4 cups sifted powdered sugar, about 1 cup at a time, mixing thoroughly after each addition. When the mixture becomes thick and difficult to turn with the paddle, switch to a sturdy spatula and knead in any remaining sugar by hand until a soft, pliable dough forms. The texture should be workable but not greasy. Color the dough (optional): If using gel food coloring, divide the dough into portions and knead a tiny drop of gel into each portion on a powdered sugar-dusted surface until color is uniform. Wear gloves if you want impeccably clean fingers. A little gel goes a long way — start with less than you think you'll need. Roll into ropes: Lightly dust your work surface with powdered sugar. Roll each portion into thin ropes approximately 1/4 inch to 1/2 inch in diameter. Maintain even pressure so pieces cook (dry) uniformly; ropes that are too thick may stay soft in the center. Cut into bite-sized pieces: Using a bench scraper or a sharp knife, cut the ropes into 1/2 to 3/4-inch pieces. For a decorative touch, press lightly with the back of a fork to create a ridged surface on each mint or leave them smooth. Dry at room temperature: Arrange pieces on parchment paper in a single layer. Allow to dry at room temperature for 8 hours or overnight until the exterior firms slightly and pieces hold their shape. Avoid refrigeration during drying; moisture from the fridge can soften them.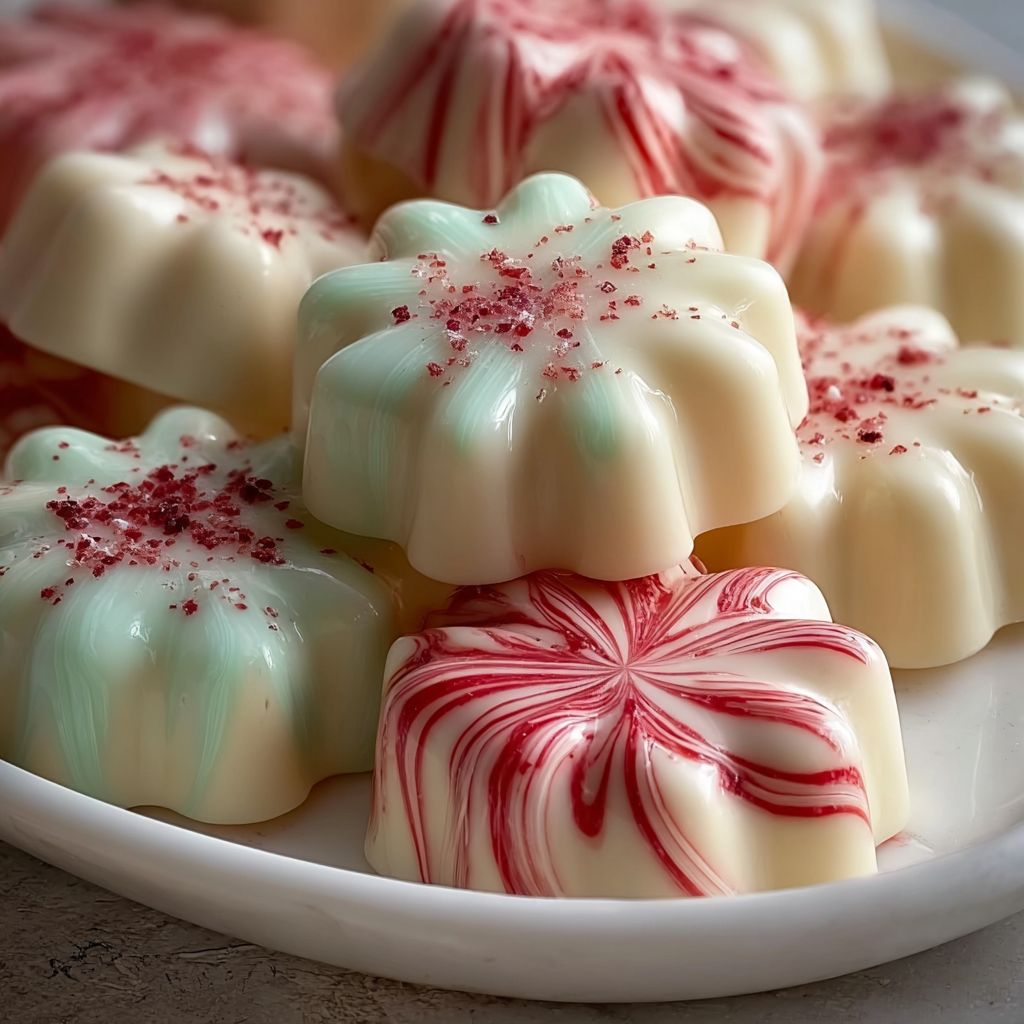
You Must Know
- These are shelf-stable for a few days in an airtight container at room temperature; avoid humid or very warm environments that can soften them.
- They freeze well for up to 3 months; thaw at room temperature before serving to preserve texture.
- Gel coloring is key for vibrant hues without changing consistency; liquid dyes make the dough sticky.
- Drying time is significant — allow at least 8 hours so edges firm up for handling and packaging.
- Because they are sugar-heavy, the mints are high in carbs and calories; enjoy in small portions.
My favorite aspect is how forgiving the process is — even if your ropes vary slightly in diameter, they still yield delightful bites once dried. A jar of these returned to a friend after a long week received an immediate text: 'These taste exactly like comfort.' That's the magic: simple ingredients producing a nostalgic, comforting flavor that sparks small celebrations at home.
Storage Tips
Store the finished mints in an airtight container layered between sheets of parchment to prevent sticking. At room temperature in a cool, dry place, they will keep nicely for up to 10 days; humidity shortens this, so choose a dry cupboard away from ovens or sunny windows. For longer storage, freeze in a sealed container with parchment between layers for up to 3 months. Thaw at room temperature for 30 to 60 minutes before serving. Avoid refrigeration during drying or storage as condensation can make them sticky and dull the surface.

Ingredient Substitutions
If you want a dairy-free variation, substitute vegan butter and a splash of full-fat coconut milk; the texture will be slightly different — a touch more coconut flavor and a slightly softer finish. For a lighter option, use whole milk instead of heavy cream; the texture becomes a bit firmer and less creamy. To change the flavor profile, swap peppermint extract for lemon extract or orange oil for citrus mints; reduce citrus extract to 1/4 teaspoon because those flavors can be more concentrated. Avoid liquid food coloring; it increases moisture and makes the dough sticky. For a chocolate twist, remove 1/2 cup powdered sugar and add 1 tablespoon cocoa powder, but expect darker color and slightly different consistency.
Serving Suggestions
These tiny confections are perfect in small apothecary jars tied with ribbon for gifts, scattered on a dessert platter between cookies and chocolates, or served in small bowls alongside tea or coffee. Try alternating colors in a striped jar for a pretty presentation, or place a few on the saucer of each coffee cup at a dinner party. For special occasions, press edible glitter or tiny sugar pearls on top before they finish drying. Pair them with strong black tea, espresso, or a dessert wine — their sweetness and minty finish cut through rich flavors beautifully.
Cultural Background
Butter mints are a classic American confection with roots in simple home candy-making traditions from the 19th and 20th centuries. They became especially popular because they required no candy thermometer and minimal equipment — ideal for households without stovetop experience. Often associated with holidays, social gatherings, and homemade gift exchanges, these sweets carry a nostalgic charm similar to fondant candies and molded hard mints. Regional variations include faintly flavored butter candies or rolled mints tinted in pastel shades for springtime celebrations.
Seasonal Adaptations
In winter, keep the classic white or add splashes of red for peppermint-striped candies. For spring and Easter, pastel greens, pinks, and yellows are charming; add a touch of lemon extract for a spring twist. During summer gatherings, lime or spearmint variations feel refreshingly light. For Valentine's Day, tint the dough pink and use heart-shaped cutters if you prefer shapes to the traditional cut pieces. Adjust drying time slightly in humid months by using a dehumidifier or placing the tray in a cool, dry room.
Success Stories
Readers often tell me these are the first homemade candies they successfully made without a candy thermometer. One friend wrote that her three-year-old measured, mixed, and cut while her husband watched in disbelief at how easily they came together. Another reader uses them as wedding favors in small organza bags, and reports guests loved the homemade touch. These stories remind me why I keep this recipe in the top drawer: it's approachable, shareable, and reliably delightful.
Meal Prep Tips
Make the dough up to 24 hours ahead and keep it wrapped tightly in plastic in the refrigerator; bring portions to room temperature before rolling. Pre-roll ropes and store them on parchment in a single layer under a loose towel to prevent drying out; cut and finish the drying the day you plan to serve them. For gift prep, portion into small jars with parchment dividers and label with the make date. If you plan to freeze, freeze in a single layer until firm, then transfer to a sealed container to prevent crushing.
These small, buttery mints are a testament to the pleasures of uncomplicated confectionery — minimal fuss, maximum charm. Make a batch, share a jar, and enjoy the tiny moments of delight they create.
Pro Tips
Always sift powdered sugar before adding to prevent lumps and to achieve a silky texture.
Work on a surface lightly dusted with powdered sugar to prevent sticking and to make rolling easier.
Use gel food coloring instead of liquid to avoid adding moisture that would change the dough consistency.
Allow at least 8 hours of drying time at room temperature; refrigeration can cause condensation and soften the exterior.
This nourishing old-fashioned butter mints recipe is sure to be a staple in your kitchen. Enjoy every moist, high protein slice — it is perfect for breakfast or as a wholesome snack any time.
Tags
Old-Fashioned Butter Mints
This Old-Fashioned Butter Mints recipe makes perfectly juicy, tender, and flavorful steak every time! Serve with potatoes and a side salad for an unforgettable dinner in under 30 minutes.
Ingredients
Main
Optional
Instructions
Cream the butter
Place 1/2 cup softened unsalted butter in a large bowl and beat with an electric mixer on medium until smooth and pale, about 2 minutes. Scrape down sides for even texture.
Add flavor and liquid
Mix in 1/2 teaspoon peppermint extract, a pinch of salt, and 1 tablespoon heavy cream or milk until fully combined and smooth.
Add powdered sugar
Gradually add 4 cups sifted powdered sugar, mixing on low until a soft dough forms. When too stiff for the mixer, finish kneading with a spatula or hands on a powdered sugar-dusted surface.
Divide and color
Divide dough into portions if using multiple colors. Knead a tiny drop of gel food coloring into each portion until evenly colored. Wear gloves if desired.
Shape into ropes
Roll each portion into thin ropes about 1/4 to 1/2 inch in diameter on a powdered sugar-dusted board to prevent sticking.
Cut into pieces
Using a bench scraper or sharp knife, cut ropes into 1/2 to 3/4-inch pieces. Optionally press lightly with a fork for a decorative top.
Dry mints
Arrange pieces on parchment in a single layer and allow to dry at room temperature for at least 8 hours or overnight until the exterior firms slightly.
Last Step: Please leave a rating and comment letting us know how you liked this recipe! This helps our business to thrive and continue providing free, high-quality recipes for you.
Nutrition
Did You Make This?
Leave a comment & rating below or tag
@aiolirecipe on social media!
Categories:
You might also like...

Fall Harvest Pasta Salad
A cozy, colorful salad that celebrates autumn flavors — roasted butternut squash and Brussels sprouts tossed with pasta, cranberries, pecans, and tangy feta, finished with a balsamic vinaigrette.

Cilantro Lime Steak Bowls
Bright, tangy cilantro-lime marinated flank steak served over rice with black beans, corn, fresh veggies and creamy avocado for a fast, healthy weeknight bowl.

Pecan Pie Crescent Rolls
Buttery crescent rolls filled with a sweet pecan pie–inspired filling — a quick, crowd-pleasing dessert perfect for holidays or weeknight cravings.
Did You Make This?
Leave a comment & rating below or tag @aiolirecipe on social media!
Rate This Recipe
Share This Recipe
Enjoyed this recipe? Share it with friends and family, and don't forget to leave a review!
Comments (1)
This recipe looks amazing! Can't wait to try it.
Comments are stored locally in your browser. Server comments are displayed alongside your local comments.
Hi, I'm Olivia!
What's Popular

30-Minute Meals!
Join to receive our email series which contains a round-up of some of our quick and easy family favorite recipes.