
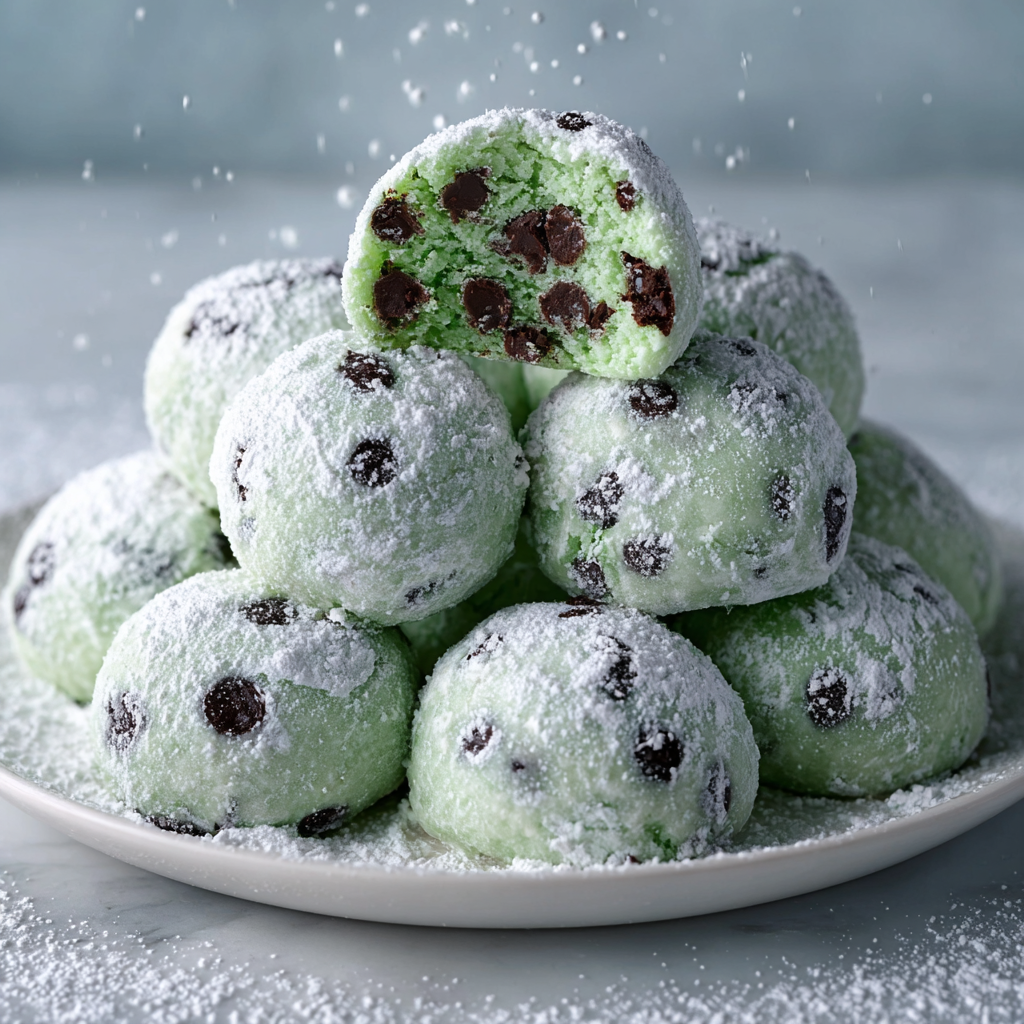
Easy Melt-in-Your-Mouth Mint Chocolate Chip Snowball Cookies

Buttery, mint scented, mini chocolate studded cookies rolled in two snow layers of powdered sugar for a festive, melt in your mouth treat.

This recipe is my go to when I want a cookie that feels festive yet effortless. I first discovered this combination during a holiday baking afternoon when I wanted the soft, tender texture of classic snowball cookies with a bright mint lift and the joyful pop of mini chocolate chips. The result is a cookie that melts nearly on contact yet still holds a clean, snowy coating. I remember handing a warm cookie to my neighbor and watching her eyes widen at the texture and flavor. That moment cemented this as a recipe I return to every December and whenever I need a simple impressive sweet.
These cookies are delicate because the butter is beaten until light and then chilled briefly before baking. The peppermint extract is used sparingly to keep the flavor clean and refreshing rather than overpowering. Mini chocolate chips provide little pockets of chocolate that contrast with the powdery exterior. Whether you make them in green for holiday cheer or classic pale ivory, they deliver the nostalgic comfort of a holiday classic with a lift that makes them new again.
Why You'll Love This Recipe
- Buttery, tender texture that practically dissolves in your mouth while still holding its shape during baking and handling.
- Ready in about one hour when you include chilling time, with only 10 to 12 minutes of actual baking per batch.
- Uses pantry staples like all purpose flour and granulated sugar plus mini chocolate chips which are easy to find year round.
- Make ahead friendly because dough can be chilled overnight and fully baked cookies freeze beautifully for quick desserts.
- Customizable color and mint intensity so these are great for holidays, cookie exchanges, or themed parties.
On my first run I tinted half the dough a pale mint and left the remainder natural. Friends could not stop comparing textures and color. The cookie exchange table emptied quickly and I learned that slightly underbaking by sight keeps the interior soft which is the trick to that melt in your mouth finish.
Ingredients
- Unsalted butter: Use 1 cup which equals 2 sticks, softened but not melted. Opt for a high quality brand such as Plugra or Kerrygold for a richer flavor. Butter provides the tender, flaky crumb and is the primary source of flavor here.
- Granulated sugar: 1/2 cup. This helps with aeration when creamed with the butter and keeps the interior light. For a subtler sweetness you can use organic cane sugar.
- Pure vanilla extract: 1 teaspoon. Use a real vanilla for depth, not imitation.
- Peppermint extract: 1 teaspoon. A little goes a long way so measure carefully. I like Simply Organic or Nielsen Massey because they taste clean and bright.
- All purpose flour: 2 and 1 quarter cups. Spoon and level into your cup for accurate measure. King Arthur or Bob s Red Mill perform reliably.
- Salt: 1/4 teaspoon to balance the sweetness and highlight the chocolate and mint.
- Mini chocolate chips: 1 cup. Mini chips distribute evenly through the dough so every bite gets chocolate. Ghirardelli or Nestle Toll House mini chips are both excellent.
- Powdered sugar: 1 and 1 half cups divided. Use sifted confectioners sugar for the smoothest coating. You will roll the cookies in a first light coat then a second heavy snowy coat after cooling.
- Optional food coloring: A few drops of green to tint for holiday presentation. Gel colors blend well without watering down the dough.
Instructions
Preheat and prepare: Set your oven to 350 degrees Fahrenheit which equals 175 degrees Celsius. Line two or three large baking sheets with parchment paper or silicone baking mats so cookies bake on an even surface. Preheating ensures predictable oven spring and gentle browning. Combine dry ingredients: In a medium bowl whisk together the all purpose flour and salt until evenly distributed. This step helps prevent salty pockets and promotes even mixing when added to the butter. Cream butter and sugar: In a large mixing bowl beat the softened unsalted butter on medium speed for 1 to 2 minutes until light and creamy. Gradually add the granulated sugar and beat for another 2 to 3 minutes until the mixture is pale and fluffy. Scrape down the bowl periodically to ensure an even texture. This aeration contributes to tenderness. Flavoring and color: Beat in the pure vanilla extract and peppermint extract until just combined. If you want a pastel green hue add a few drops of gel green food coloring and mix to your desired shade. Avoid using liquid color which can change dough consistency. Add dry ingredients: With the mixer on low speed add the flour and salt mixture in three additions, mixing just until combined after each addition. Stop as soon as you no longer see streaks of flour to avoid developing gluten which would toughen the cookies. Fold in chocolate: Remove the bowl from the mixer and fold in the mini chocolate chips with a rubber spatula until evenly distributed. The dough will be thick and slightly sandy which is normal for this tender style. Chill the dough: Cover the bowl tightly with plastic wrap and refrigerate for at least 30 minutes to 1 hour. Chilling firms the butter so the cookies spread less and keeps the centers soft. Shape the cookies: Scoop out dough using a small cookie scoop about 1 tablespoon in size. Roll each portion between your palms into smooth balls about 1 inch in diameter. Space them 1 to 1 and 1 half inches apart on the prepared baking sheets so they do not touch when they expand. Bake: Bake for 10 to 12 minutes until edges are lightly golden and centers look set but still pale. The cookies will firm as they cool so avoid overbaking. If baking multiple sheets rotate them halfway through for even color. First roll in powdered sugar: Let the cookies rest on the baking sheet for 5 to 10 minutes then transfer to a wire rack. While still warm but not hot roll each cookie in a shallow bowl with 1 half cup of powdered sugar until coated. This initial coating helps the second layer adhere. Cool and second coating: Allow cookies to cool completely, at least 30 to 60 minutes, then roll each one thoroughly in the remaining 1 cup of powdered sugar for a thick snowy finish.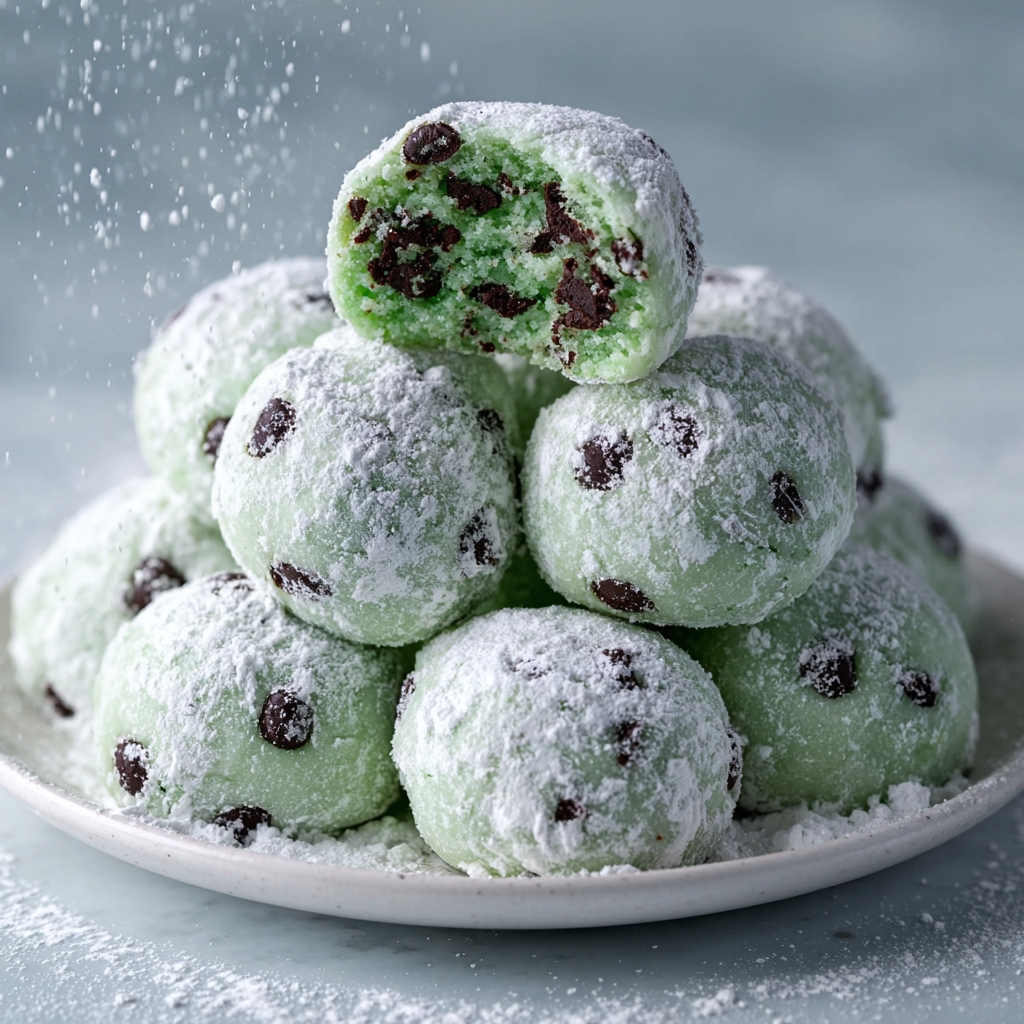
You Must Know
- These cookies freeze well. Store baked cookies in an airtight container for up to 3 months. Thaw at room temperature and refresh the powdered sugar coating if needed.
- They are not suitable for a dairy free diet because butter is a main ingredient.
- The double powdered sugar method keeps the outer texture snowy while the interior stays tender and moist.
- Use mini chips for best distribution. Regular size chips can make the dough uneven and the cookies less delicate.
My favorite aspect is handing a warm cookie to someone who thinks it will be dense and seeing them realize it almost melts. One winter I packed a tin and delivered it to a friend recovering from surgery and she told me it brightened her day. Small things like that are why I bake this often.
Storage Tips
Store in an airtight container layered with parchment paper at room temperature for up to 5 days. For longer storage freeze single layers on a tray until solid then transfer to freezer safe containers. Thaw at room temperature and refresh the powdered sugar by gently dusting or rolling in a light coat for presentation. If you plan to ship these place cookies in a single layer separated by parchment and pack with cushioning to avoid crushing.
Ingredient Substitutions
You can swap part of the all purpose flour with cake flour for an even softer crumb using a one to one conversion. For a dairy free version substitute a high quality vegan butter at a one to one ratio though texture will vary slightly. If you need them nut free check your chocolate chips label as some brands are processed in facilities that handle nuts. You can omit the mint extract and use orange zest for a different but lovely profile.
Serving Suggestions
These are perfect with a mug of hot chocolate, a small glass of milk, or coffee. For a holiday platter combine with spiced cookies and shortbread. Garnish with a fresh mint leaf for presentation or serve in mini cupcake liners for a bake sale. They also pair nicely with lightly whipped cream or a scoop of peppermint ice cream for an indulgent dessert.
Cultural Background
Snowball style cookies have long been associated with winter celebrations because the powdered sugar coating resembles freshly fallen snow. Variations appear around the world such as Mexican polvorones and Russian tea cakes. The mint and chocolate combination is a modern twist that blends classic textures with a seasonal flavor.
Seasonal Adaptations
For winter holidays tint the dough pale green as suggested. For Valentine s Day try a blush pink with a touch of vanilla bean. In spring incorporate lemon zest and white chocolate chips instead of mint. Small changes to extract or zest transform the character while maintaining the tender texture.
Meal Prep Tips
Portion dough with a cookie scoop and freeze raw balls on a tray until solid then transfer to a labeled zip top bag. When ready bake from frozen, adding a minute or two to the baking time. This approach gives you freshly baked cookies on demand without the prep. Keep a jar of sifted powdered sugar near your baking station for quick finishing.
These mint chocolate chip snowball cookies are a small, reliable joy whether you are giving them away or keeping them close. They are easy enough for a weekday treat and pretty enough for company. I hope you make them often and share the story of the first time you tried them.
Pro Tips
Chill the dough for at least 30 minutes so the butter firms and the cookies spread less during baking.
Use a small cookie scoop to create uniform sizes so all cookies bake evenly.
Roll in a light powdered sugar coat while warm and a second thick coat after cooling for the classic snowball finish.
If powdered sugar clumps sift it before rolling for the smoothest coating.
Freeze dough balls on a tray then transfer to a bag to bake fresh cookies whenever you want.
This nourishing easy melt-in-your-mouth mint chocolate chip snowball cookies recipe is sure to be a staple in your kitchen. Enjoy every moist, high protein slice — it is perfect for breakfast or as a wholesome snack any time.
Tags
Easy Melt-in-Your-Mouth Mint Chocolate Chip Snowball Cookies
This Easy Melt-in-Your-Mouth Mint Chocolate Chip Snowball Cookies recipe makes perfectly juicy, tender, and flavorful steak every time! Serve with potatoes and a side salad for an unforgettable dinner in under 30 minutes.
Ingredients
Dough
Coating
Instructions
Preheat and line pans
Preheat oven to 350 degrees Fahrenheit and line two or three baking sheets with parchment or silicone mats.
Mix dry ingredients
Whisk the all purpose flour with the salt in a medium bowl and set aside to ensure even distribution.
Cream butter and sugar
Beat softened butter on medium speed 1 to 2 minutes then add granulated sugar and beat 2 to 3 minutes until pale and fluffy, scraping the bowl as needed.
Add extracts and color
Beat in vanilla and peppermint extract until combined and add a few drops of gel green food coloring if using until desired shade is reached.
Incorporate flour
With mixer on low add flour mixture in three additions mixing just until combined after each to avoid overworking the dough.
Fold in chocolate
Remove from mixer and gently fold in mini chocolate chips with a rubber spatula until evenly distributed.
Chill
Cover tightly with plastic wrap and refrigerate at least 30 minutes to 1 hour so the dough firms and is easier to shape.
Shape
Scoop about 1 tablespoon portions and roll between palms into 1 inch balls. Place on prepared sheets 1 to 1 and 1 half inches apart.
Bake
Bake 10 to 12 minutes until edges are lightly golden and centers appear set but pale. Do not overbake to maintain tenderness.
First powdered sugar roll
Cool on sheet 5 to 10 minutes then roll warm cookies in 1 half cup sifted powdered sugar and transfer to a wire rack.
Cool fully and second roll
Allow cookies to cool to room temperature for 30 to 60 minutes then roll each cookie in remaining 1 cup powdered sugar for a thick snowy coating.
Last Step: Please leave a rating and comment letting us know how you liked this recipe! This helps our business to thrive and continue providing free, high-quality recipes for you.
Nutrition
Did You Make This?
Leave a comment & rating below or tag
@aiolirecipe on social media!
Categories:
You might also like...

Fall Harvest Pasta Salad
A cozy, colorful salad that celebrates autumn flavors — roasted butternut squash and Brussels sprouts tossed with pasta, cranberries, pecans, and tangy feta, finished with a balsamic vinaigrette.

Cilantro Lime Steak Bowls
Bright, tangy cilantro-lime marinated flank steak served over rice with black beans, corn, fresh veggies and creamy avocado for a fast, healthy weeknight bowl.

Pecan Pie Crescent Rolls
Buttery crescent rolls filled with a sweet pecan pie–inspired filling — a quick, crowd-pleasing dessert perfect for holidays or weeknight cravings.
Did You Make This?
Leave a comment & rating below or tag @aiolirecipe on social media!
Rate This Recipe
Share This Recipe
Enjoyed this recipe? Share it with friends and family, and don't forget to leave a review!
Comments (1)
This recipe looks amazing! Can't wait to try it.
Comments are stored locally in your browser. Server comments are displayed alongside your local comments.
Hi, I'm Olivia!
What's Popular

30-Minute Meals!
Join to receive our email series which contains a round-up of some of our quick and easy family favorite recipes.