
Mini Grilled Cheese Hawaiian Rolls: An Incredible Ultimate Recipe

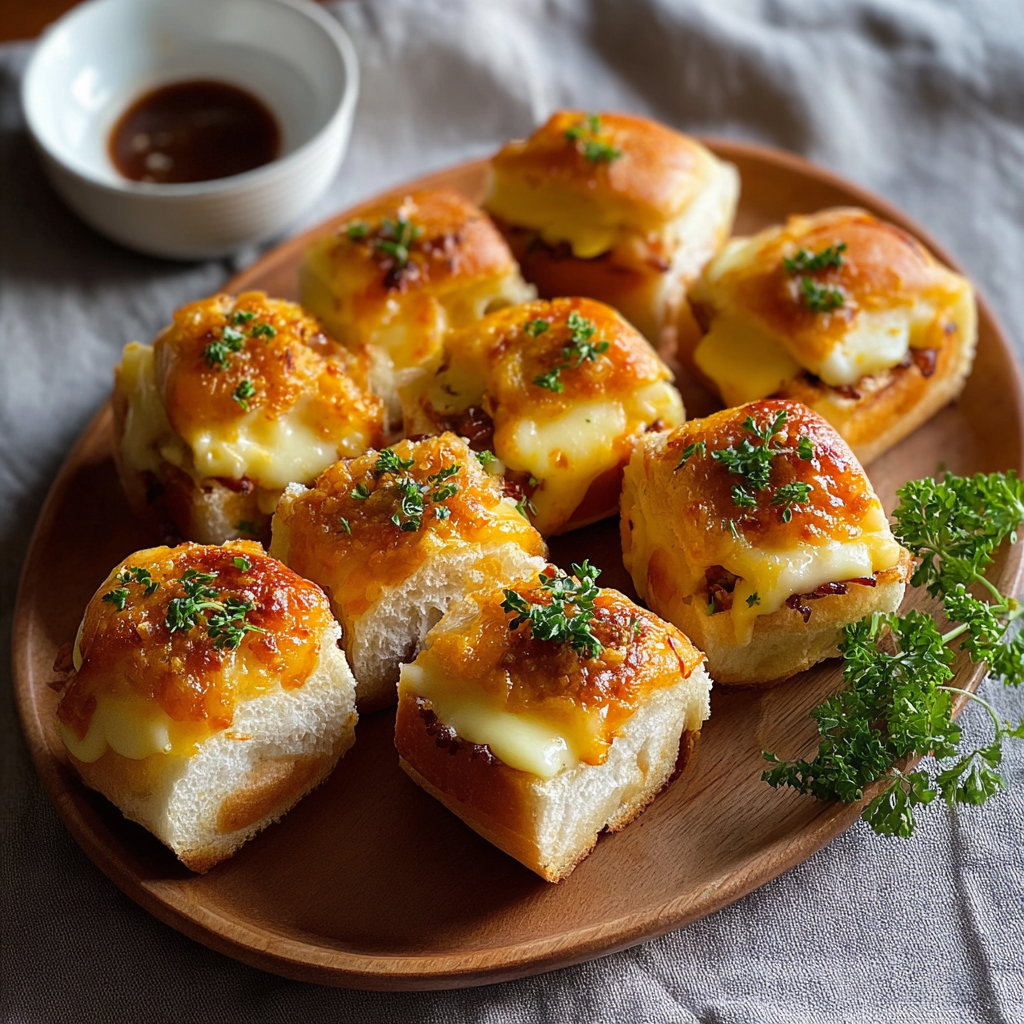
Soft, slightly sweet rolls stuffed with gooey cheddar and mozzarella, baked until golden — the ultimate party bite or weeknight comfort food.

This recipe for Mini Grilled Cheese Hawaiian Rolls has been one of those accidental discoveries that turns simple ingredients into something utterly irresistible. I first made it for a last-minute neighborhood potluck when I realized I had a pack of sweet Hawaiian rolls and a mixed bag of shredded cheeses in the fridge. Within minutes the kitchen filled with warm, buttery aromas and every neighbor insisted on the recipe that night. What makes this version special is the contrast between the soft, slightly sweet roll and the tang of sharp cheddar, softened by mellow mozzarella. The result is gooey, comforting, and a little bit nostalgic — like the grown-up version of the sandwich you loved as a kid.
Over the years I’ve refined the approach so the assembly stays fast and predictable, and the baking yields consistently melted cheese with a golden top. These mini sandwiches work as snacks, appetizers, or even a playful dinner with a salad. I often make a double batch for gatherings because they vanish quickly. In cooler months the warm, cheesy center feels like a hug in handheld form, and in summer they’re a hit at backyard barbecues because they travel well when wrapped and kept warm in a foil-lined carrier.
Why You'll Love This Recipe
- Ready in under 30 minutes from start to finish; quick prep and short bake time make it perfect for last-minute entertaining.
- Uses pantry and fridge staples — Hawaiian rolls, shredded cheddar, shredded mozzarella, and butter — so you can usually make it without a trip to the store.
- Sweet-and-savory contrast: the soft, slightly sweet roll complements bold cheddar and stretchy mozzarella for balanced flavor and gooey texture.
- Make-ahead friendly: assemble, wrap tightly in foil, refrigerate for a few hours, then bake or reheat when guests arrive.
- Customizable: add garlic, dried herbs, or even thin ham slices to adapt to different tastes and dietary needs.
My family always crowds around the oven when these come out; the first time I made them my cousin declared them a new essential for game nights. I've learned subtle tweaks — like using softened butter for even coating and distributing cheeses precisely — that make each batch more reliably golden and perfectly molten.
Ingredients
- Hawaiian rolls: Use a 12-count package of soft, sweet Hawaiian rolls; look for King’s Hawaiian brand for consistent sweetness and texture. Keep them at room temperature so they slice cleanly.
- Cheddar cheese: 1 cup shredded sharp cheddar adds tang and bite; shred from a block for best melting and flavor, or use a good-quality pre-shredded cheddar if short on time.
- Mozzarella cheese: 1 cup shredded low-moisture mozzarella (or a blend) gives stretch and a mild milky balance to the sharp cheddar.
- Butter: 1/2 cup butter, softened to room temperature, allows even spreading; salted or unsalted both work — salted will add a bit more flavor.
- Garlic powder (optional): 1 teaspoon sprinkled over the buttered bread adds a gentle savory lift without overpowering the cheeses.
- Dried herbs (optional): 1 teaspoon oregano or basil can be mixed into the butter for subtle herbal notes that pair nicely with melted cheese.
When shopping, choose cheeses with good meltability. Pre-shredded cheese sometimes contains anti-caking agents that can slightly change texture; if you want the creamiest melt, shred your cheese from blocks. For butter, a European-style butter will add a richer flavor but is not necessary.
Instructions
Preheat the oven: Set your oven to 350°F (175°C) and position the oven rack in the middle. Preheating ensures even, predictable melting; a cool oven produces uneven cheese and longer bake times. Slice the rolls: Without separating the rolls, slice the entire package horizontally into top and bottom halves. Use a long serrated knife for a clean cut. Leaving them connected makes assembly faster and prevents individual rolls from shifting while baking. Butter the cut sides: Spread the softened butter evenly over the cut surface of both the top and bottom halves. Work quickly so the butter remains soft and spreads smoothly; this creates a golden exterior and helps the optional seasonings adhere. Add garlic and herbs (optional): Sprinkle 1 teaspoon garlic powder evenly over the buttered bottoms (and tops if you like). Alternatively, mix 1 teaspoon dried oregano or basil into the butter before spreading for an herb-infused finish. Layer the cheese: Evenly distribute the shredded cheddar and mozzarella over the buttered bottom half. Aim for a uniform layer so every roll gets a consistent amount of cheese; press the cheese down lightly to compact it and reduce shifting while baking. Replace the top half: Carefully place the top half of the rolls back onto the cheese-topped bottom. Press gently to seat the pieces together evenly without squeezing out the cheese. Wrap tightly: Tightly wrap the entire assembly in aluminum foil. This traps steam and ensures the cheese melts thoroughly without drying out the bread. Seal the edges well to keep heat and moisture inside. Bake then crisp: Bake the wrapped rolls at 350°F (175°C) for 15 to 20 minutes, until cheese is melted. For a golden crust, unwrap the foil and return to the oven for an additional 5 minutes or place briefly under the broiler, watching carefully to prevent burning. Slice and serve: Let the rolls rest 1 to 2 minutes after removing from the oven, then slice into individual rolls with a serrated knife and serve warm. The short rest helps the cheese set slightly and prevents overly runny filling.
You Must Know
- These handhelds freeze well for up to 3 months if wrapped tightly in foil and stored in a freezer-safe bag; thaw overnight in the fridge then reheat wrapped at 350°F (175°C) for 10 to 12 minutes.
- High in protein and calcium thanks to the cheeses, but not gluten-free or dairy-free unless you swap bread and cheese for specialty alternatives.
- Best served hot; cheese firms up as it cools, so plan to serve within 15 minutes for optimal gooeyness.
- If you prefer a crisper crust, finish under the broiler for 30 to 90 seconds while watching closely to avoid burning.
My favorite thing about this version is how flexible it is: once I started using herbs in the butter and pressing the cheese layer lightly, every batch came out evenly melted and flavorful. Guests often ask what I did differently, and the answer is usually 'a little patience and a good knife.'
Storage Tips
Store cooled leftovers in an airtight container in the refrigerator for up to 3 days. To reheat, wrap in foil and warm at 350°F (175°C) for 8 to 12 minutes until heated through. For crispier tops, unwrap for the last 2 minutes of reheating or broil briefly. When freezing, wrap the entire sealed sandwich in plastic wrap then in foil and place in a freezer bag; label with date and use within 3 months for best quality.
Ingredient Substitutions
If you want to reduce dairy, swap half the mozzarella for a dairy-free shredded alternative, though meltability and flavor will differ. For a gluten-free option, use gluten-free slider buns sized to match 12 pieces; note texture will be denser. Replace cheddar with smoked gouda or havarti for different flavor profiles, and if you like a protein boost, tuck in thinly sliced deli ham or cooked bacon between the cheese layers at a ratio of about 6 slices per 12-roll pack.
Serving Suggestions
Serve these with a simple green salad dressed in a bright vinaigrette to cut through the richness. They pair beautifully with tomato soup for a classic combination, or offer an array of dipping sauces like marinara, ranch, or a honey-mustard. For parties, present them on a wooden board with toothpicks and a garnish of chopped parsley or sliced scallions for a pop of color.
Cultural Background
Grilled cheese is an American comfort staple with roots in early 20th-century bread and cheese technologies. Using Hawaiian rolls adds a twist that became popular in home kitchens and potlucks because the rolls’ sweetness balances cheese richness. This approach is part of a broader trend of transforming familiar sandwiches into party-friendly finger foods, bridging nostalgic flavors with modern entertaining needs.
Seasonal Adaptations
In winter, add a pinch of smoked paprika and swap mozzarella for a melting fontina for a richer profile. In summer, use a lighter cheese blend and top with a spoonful of fresh tomato bruschetta after baking for brightness. Holiday versions can include cranberry-mustard spread or thin slices of roasted turkey tucked into the cheese for a seasonal slider.
Meal Prep Tips
For meal prep, assemble the rolls and wrap tightly in foil, then refrigerate up to 24 hours before baking. If preparing for a later date, freeze fully assembled and wrapped; bake from frozen adding an extra 5 to 8 minutes to the initial covered bake time. Use labeled foil packets for easy grab-and-bake servings during the week.
These miniature melts are one of those small pleasures that prove simple ingredients, handled thoughtfully, create memorable food. Whether you’re feeding a crowd or making a cozy solo dinner, they’re reliably comforting — and with these tips, reliably perfect every time.
Pro Tips
Soften butter to room temperature for easy, even spreading; cold butter tears the bread.
Shred cheese from blocks for better melt and flavor; pre-shredded cheese often contains anti-caking agents.
Wrap tightly in foil to trap steam and ensure cheese melts evenly before unwrapping to brown.
This nourishing mini grilled cheese hawaiian rolls: an incredible ultimate recipe recipe is sure to be a staple in your kitchen. Enjoy every moist, high protein slice — it is perfect for breakfast or as a wholesome snack any time.
FAQs about Recipes
Can I assemble these ahead of time?
Yes. Assemble and wrap the rolls tightly, then refrigerate up to 24 hours before baking. For longer storage, freeze and bake from frozen with a few extra minutes.
How do I slice the rolls without tearing them?
Use a serrated knife and a long, steady sawing motion to slice the whole pack horizontally for a clean, even cut.
Can I broil the top for crispness?
Watch under the broiler closely; it takes 30 to 90 seconds to brown the top. Remove immediately when golden.
Tags
Mini Grilled Cheese Hawaiian Rolls: An Incredible Ultimate Recipe
This Mini Grilled Cheese Hawaiian Rolls: An Incredible Ultimate Recipe recipe makes perfectly juicy, tender, and flavorful steak every time! Serve with potatoes and a side salad for an unforgettable dinner in under 30 minutes.
Ingredients
Cheeses
Butter & Seasoning
Instructions
Preheat the oven
Preheat oven to 350°F (175°C) and position the oven rack in the center for even heat distribution.
Slice the roll pack
Without separating individual rolls, slice the entire package horizontally with a long serrated knife to create a top and bottom half.
Butter both halves
Spread softened butter evenly over the cut surfaces of both top and bottom halves to promote golden crust and flavor.
Season the butter
Sprinkle garlic powder across the buttered surface or mix dried herbs into the butter before spreading for extra flavor.
Layer the cheeses
Distribute shredded cheddar and mozzarella evenly over the bottom half, pressing lightly to compact the layer for uniform melting.
Rejoin and wrap
Place the top half back on, press gently, then wrap the entire assembly tightly in aluminum foil to trap steam for even melting.
Bake then brown
Bake wrapped at 350°F (175°C) for 15 to 20 minutes until cheese is melted. Unwrap and bake an additional 5 minutes or broil briefly to brown the top.
Slice and serve
Allow to rest 1 to 2 minutes, then slice into individual rolls and serve warm for best gooey texture.
Last Step: Please leave a rating and comment letting us know how you liked this recipe! This helps our business to thrive and continue providing free, high-quality recipes for you.
Nutrition
Did You Make This?
Leave a comment & rating below or tag
@aiolirecipe on social media!
Categories:
You might also like...

Fall Harvest Pasta Salad
A cozy, colorful salad that celebrates autumn flavors — roasted butternut squash and Brussels sprouts tossed with pasta, cranberries, pecans, and tangy feta, finished with a balsamic vinaigrette.

Cilantro Lime Steak Bowls
Bright, tangy cilantro-lime marinated flank steak served over rice with black beans, corn, fresh veggies and creamy avocado for a fast, healthy weeknight bowl.

Pecan Pie Crescent Rolls
Buttery crescent rolls filled with a sweet pecan pie–inspired filling — a quick, crowd-pleasing dessert perfect for holidays or weeknight cravings.
Did You Make This?
Leave a comment & rating below or tag @aiolirecipe on social media!
Rate This Recipe
Share This Recipe
Enjoyed this recipe? Share it with friends and family, and don't forget to leave a review!
Comments (1)
This recipe looks amazing! Can't wait to try it.
Comments are stored locally in your browser. Server comments are displayed alongside your local comments.
Hi, I'm Olivia!
What's Popular

30-Minute Meals!
Join to receive our email series which contains a round-up of some of our quick and easy family favorite recipes.