
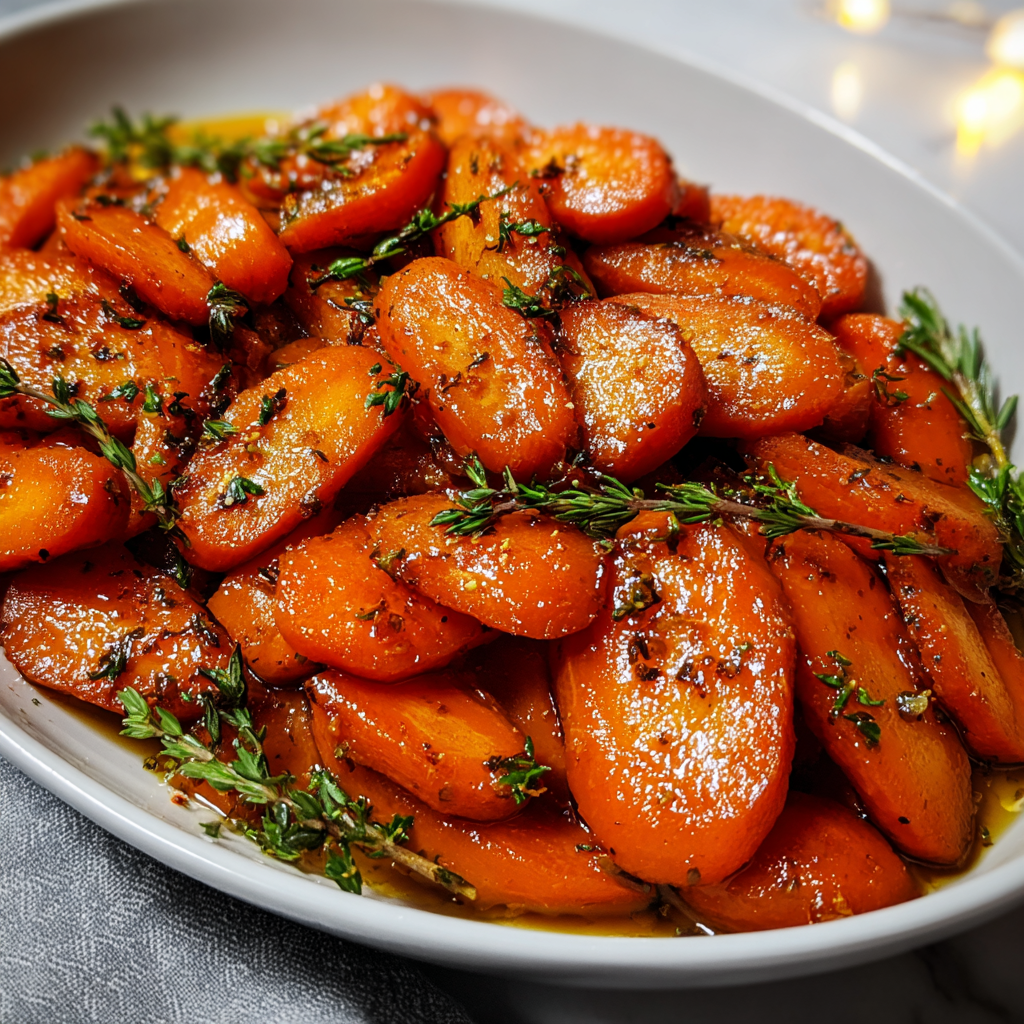
Glazed Carrots

Sweet, buttery glazed carrots with a glossy honey-brown sugar coating — a simple, crowd-pleasing side that's ready in under 20 minutes.

This simple glazed carrots dish has been a quiet star at my table for years. I first learned this combination one winter evening when I needed a quick, bright side to balance a roasted chicken. The sweetness of honey and brown sugar fused with a touch of butter created a glossy coating that brought out the natural sweetness of the carrots without masking their earthy flavor. The texture is the highlight: tender but still with a gentle bite, not mushy, finished with a silky glaze that clings to each slice.
I often make this when guests drop by unexpectedly because the ingredient list is short and the technique is forgiving. The recipe works beautifully with farm-fresh carrots straight from the farmer's market, but it also improves humble grocery-store carrots. It pairs especially well with roasted meats and grain bowls, and family members always comment on the shine and balance of flavors. It’s one of those dishes that reads elegant on the plate while actually being exceptionally easy to prepare.
Why You'll Love This Recipe
- Ready in about 20 minutes from start to finish, making it perfect for busy weeknights or last-minute guests.
- Uses pantry staples — butter, honey, and brown sugar — so you rarely need a special trip to the store.
- Balances sweet and savory: the glaze accentuates the carrot’s natural sugars while a pinch of salt keeps it grounded.
- Make-ahead friendly: cook fully and reheat gently, or finish glazing just before serving for best texture.
- Kid-approved and crowd-pleasing — a great way to get vegetables onto plates at family meals and holiday gatherings.
In my house, this recipe became a holiday staple the year my toddlers refused everything green but loved anything shiny. We discovered that a quick toss in a sweet glaze made carrots vanish from plates. Over time I refined the timing to keep the slices tender yet firm and learned to finish with a hot pan toss so every piece gets coated in glassy glaze.
Ingredients
- 1 pound carrots, peeled and sliced: Look for firm, bright-orange carrots without green tops for the sweetest flavor. If carrots are large, slice on the diagonal into 1/4-inch (6 mm) pieces so they cook evenly. Baby carrots work too, but adjust times slightly.
- 2 tablespoons unsalted butter: Unsalted gives you control over seasoning; use a good-quality butter like Kerrygold or Plugrá for a richer mouthfeel. If using salted butter, reduce added salt.
- 2 tablespoons honey: Use mild, runny honey such as clover or wildflower for an even glaze. Raw or local honey adds subtle floral notes but can be a bit thicker.
- 1 tablespoon packed brown sugar: Light brown sugar adds molasses depth. For a deeper flavor use dark brown sugar — the result will be slightly more caramel-forward.
- Salt and freshly cracked black pepper to taste: Salt is essential to elevate the sweetness; freshly cracked pepper adds a warm counterpoint.
Instructions
Prepare the carrots:Peel the carrots and slice them uniformly on a slight diagonal into roughly 1/4-inch-thick pieces so they cook at the same rate. Uniformity is the trick to even texture; if pieces vary dramatically, smaller slices will become too soft before larger ones are tender.Blanch until tender:Bring a medium pot of salted water to a boil over high heat. Add the sliced carrots and cook for 5 to 7 minutes depending on thickness — test with a paring knife or fork: it should meet slight resistance but not feel hard. Immediately drain in a colander and give the carrots a quick shake to remove excess water. Overcooking here leads to a mushy finish; aim for tender-crisp.Make the glaze:While carrots drain, heat a medium saucepan over medium heat. Add 2 tablespoons unsalted butter and let it melt fully, then stir in 2 tablespoons honey and 1 tablespoon packed brown sugar. Stir continuously until the sugar dissolves and the mixture becomes glossy, about 1 to 2 minutes. Lower the heat to medium-low to avoid scorching. The goal is a smooth, slightly thickened glaze rather than a boiling caramel.Toss and finish:Add the drained carrots to the saucepan and toss or stir to coat evenly. Cook, stirring occasionally, for 2 to 3 minutes to let the glaze cling and reduce slightly; the pan should be hot enough to coat but not burn the sugars. If the glaze looks too thick, splash in 1 tablespoon of water to loosen. Season with salt and freshly cracked black pepper to taste and transfer to a warm serving bowl.Serve:Serve immediately for the glossiest finish. Optionally sprinkle with chopped fresh parsley, a pinch of flaky sea salt, or a squeeze of lemon to brighten flavors. Leftovers reheat gently in a skillet over low heat with a teaspoon of water to loosen the glaze.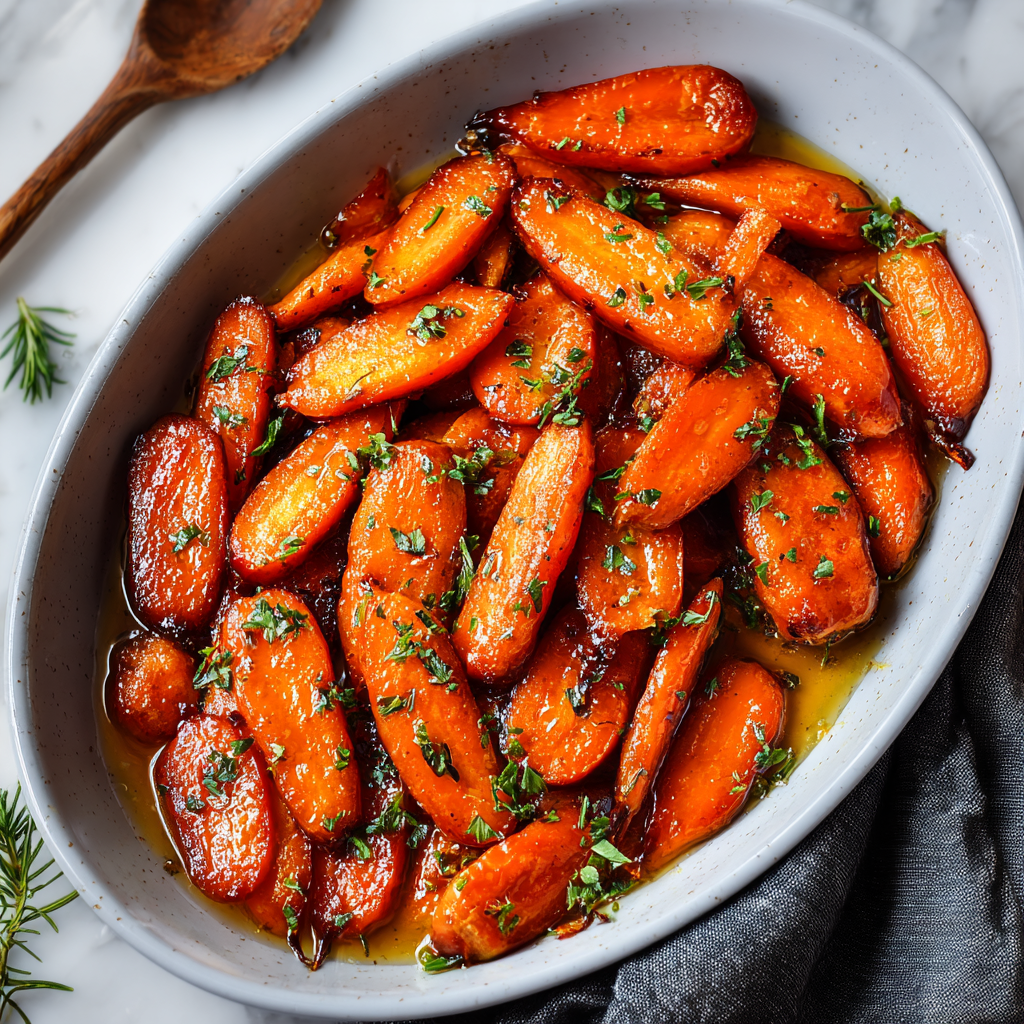
You Must Know
- Nutrition: A one-cup serving is modest in calories and supplies beta-carotene; this preparation adds sugars and fats — keep portions in mind if watching intake.
- Storage: Refrigerate cooled carrots in an airtight container for up to 4 days; reheat gently to avoid drying out the glaze.
- Make-ahead: Cook carrots fully, store unglazed, and finish with a quick pan glaze just before serving to maintain shine.
- Freezing: Cooked glazed carrots do not freeze well due to texture changes; freeze only if necessary and expect a softer result on reheating.
My favorite aspect is the transformation from raw root to jewel-like slices: the glaze amplifies the natural sugars and creates a glossy finish that looks as good as it tastes. During holiday dinners this dish often disappears first; I love that it can be both humble and celebratory depending on how it’s plated and garnished.
Storage Tips
Store cooled glazed carrots in an airtight container in the refrigerator for up to four days. Use a shallow container to cool them quickly and maintain texture. When reheating, warm gently in a skillet over low heat with a teaspoon of water or a splash of chicken stock to loosen the glaze; avoid microwaving at full power, which can make them soggy. If you plan to make them ahead for a holiday, cook the carrots to just under-done, cool, and then finish the glaze on the stove 10 minutes before serving for peak gloss and texture.
Ingredient Substitutions
If you need to swap ingredients, maple syrup is an excellent one-to-one substitute for honey for a deeper, woodsy sweetness. For a dairy-free version, replace butter with 2 tablespoons neutral oil plus 1 tablespoon vegan butter alternative, though the mouthfeel will be slightly different. Brown sugar can be substituted by coconut sugar (same quantity) for a caramel-like flavor with a lower glycemic index. For a lower-sugar option, reduce honey to 1 tablespoon and add a splash of orange juice for brightness.
Serving Suggestions
Glazed carrots pair beautifully with roast chicken, glazed ham, pork tenderloin, or as part of a vegetarian plate alongside grain pilafs. Present them on a warm platter, drizzle any remaining glaze from the pan over the top, and finish with a scatter of chopped fresh parsley or thyme. For holiday tables, add a sprinkle of toasted sliced almonds or pomegranate arils for contrast in texture and color.
Cultural Background
Sweet glazed roots appear across many culinary traditions as a way to elevate humble vegetables. In American holiday cooking, glazed carrots—often sweetened with brown sugar or honey—became popular mid-20th century as sugar became more widely accessible and glazed vegetables became a sign of festive, refined plates. The technique mirrors classic glaze methods used with carrots in European cuisines where butter and sugar are used to caramelize vegetables gently.
Seasonal Adaptations
In spring and summer, use young, tender carrots and finish with a light squeeze of lemon and finely chopped tarragon to brighten flavors. For autumn and winter, try adding a pinch of ground cinnamon or a splash of apple cider to the glaze for warming spice notes. For a holiday twist, fold in 1 teaspoon orange zest and a tablespoon of orange juice to the glaze to complement roasted meats and cut through richness.
Meal Prep Tips
For weekly meal prep, roast or steam the carrots until just tender, cool, and store unglazed in portion containers. When ready to eat, reheat in a skillet and add the glaze for a freshly finished side in under 5 minutes. This approach keeps the texture better than storing fully glazed carrots and gives you a near-fresh finish at mealtime. Use shallow containers to cool quickly and avoid condensation.
Bring these glazed carrots to your next family dinner — they’re approachable, forgiving, and delightfully glossy. Make the method your own by experimenting with sweeteners and herbs, and enjoy how a small glaze can make a simple vegetable feel special.
Pro Tips
Slice carrots uniformly on the diagonal so pieces cook evenly and present nicely.
Blanch until tender-crisp and drain immediately to prevent waterlogging the glaze.
Finish glazing in a hot pan so the sugars set quickly and create a glossy coating.
If glaze becomes too thick, add 1 teaspoon of water at a time to loosen without diluting flavor.
Use unsalted butter to control seasoning and add a pinch of flaky sea salt at the end for contrast.
This nourishing glazed carrots recipe is sure to be a staple in your kitchen. Enjoy every moist, high protein slice — it is perfect for breakfast or as a wholesome snack any time.
Tags
Glazed Carrots
This Glazed Carrots recipe makes perfectly juicy, tender, and flavorful steak every time! Serve with potatoes and a side salad for an unforgettable dinner in under 30 minutes.
Ingredients
Main
Instructions
Prep the carrots
Peel and slice carrots uniformly into approximately 1/4-inch-thick diagonal pieces to ensure even cooking.
Blanch carrots
Bring a medium pot of salted water to a boil, add carrots and cook 5–7 minutes until tender-crisp. Drain well to remove excess water.
Make the glaze
Melt 2 tablespoons unsalted butter in a medium saucepan over medium heat. Stir in 2 tablespoons honey and 1 tablespoon packed brown sugar until the sugar dissolves and mixture becomes glossy, about 1–2 minutes.
Toss and finish
Add drained carrots to the saucepan and toss to coat. Cook 2–3 minutes over medium heat so the glaze clings and reduces slightly. Season with salt and freshly cracked black pepper to taste.
Serve
Transfer to a warm serving bowl and garnish as desired. Reheat leftovers gently in a skillet with a teaspoon of water if needed.
Last Step: Please leave a rating and comment letting us know how you liked this recipe! This helps our business to thrive and continue providing free, high-quality recipes for you.
Nutrition
Did You Make This?
Leave a comment & rating below or tag
@aiolirecipe on social media!
Categories:
You might also like...

Fall Harvest Pasta Salad
A cozy, colorful salad that celebrates autumn flavors — roasted butternut squash and Brussels sprouts tossed with pasta, cranberries, pecans, and tangy feta, finished with a balsamic vinaigrette.

Cilantro Lime Steak Bowls
Bright, tangy cilantro-lime marinated flank steak served over rice with black beans, corn, fresh veggies and creamy avocado for a fast, healthy weeknight bowl.

Pecan Pie Crescent Rolls
Buttery crescent rolls filled with a sweet pecan pie–inspired filling — a quick, crowd-pleasing dessert perfect for holidays or weeknight cravings.
Did You Make This?
Leave a comment & rating below or tag @aiolirecipe on social media!
Rate This Recipe
Share This Recipe
Enjoyed this recipe? Share it with friends and family, and don't forget to leave a review!
Comments (1)
This recipe looks amazing! Can't wait to try it.
Comments are stored locally in your browser. Server comments are displayed alongside your local comments.
Hi, I'm Olivia!
What's Popular

30-Minute Meals!
Join to receive our email series which contains a round-up of some of our quick and easy family favorite recipes.