
Easy Easter Rice Krispie Nests

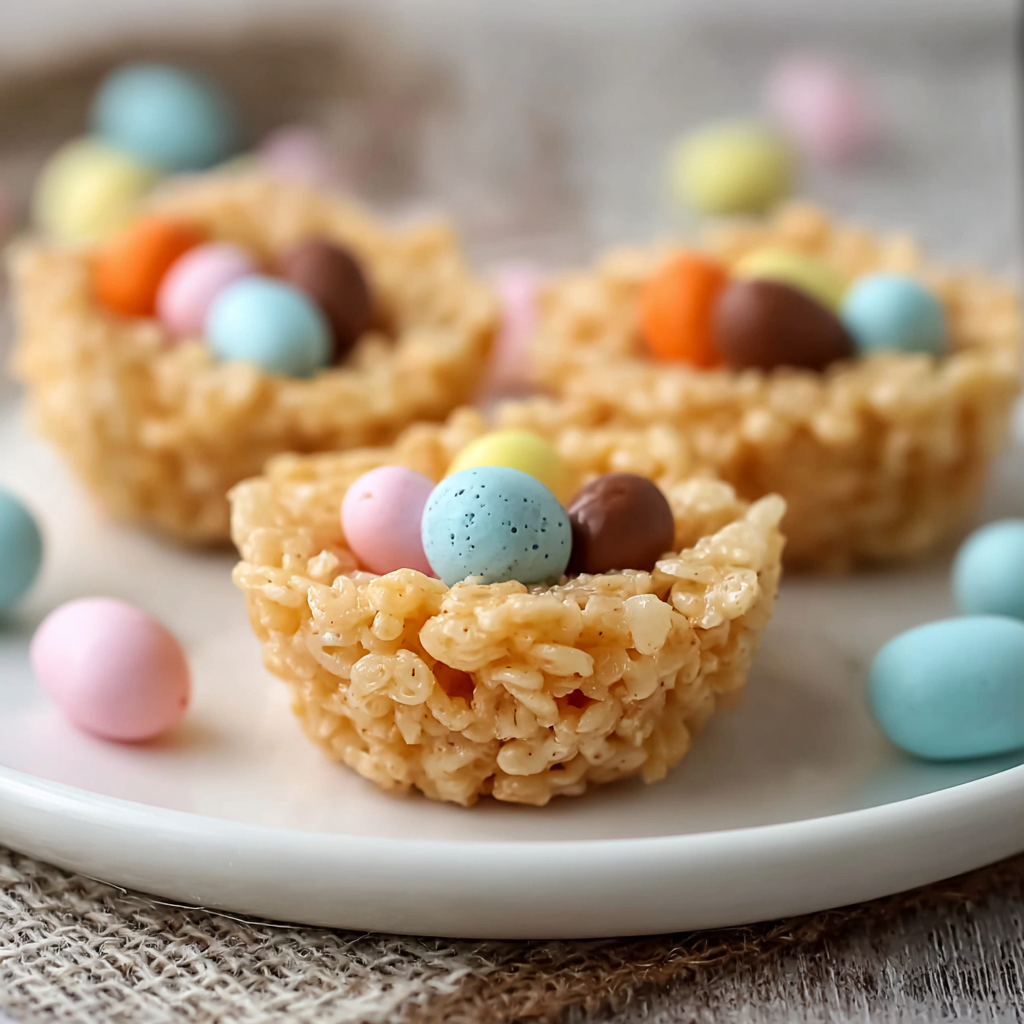
Light, crunchy puffed-rice nests filled with melted chocolate and mini candy eggs — a quick, nostalgic Easter treat the whole family will adore.

This springtime treat has become my go-to for last-minute holiday baking: simple, cheerful, and impossible not to smile at. I first made these Easy Easter Rice Krispie Nests the year my daughter insisted we do an Easter egg hunt in the living room because it was raining outside. We needed something quick, handheld, and festive to hand out to our little guests. The texture is a delightful contrast — crisp puffed rice bound by glossy, sweet marshmallow then set around a small pool of chocolate that holds two or three speckled candy eggs. It’s candy-and-child-friendly, but adults appreciate the nostalgic crunch and a hint of vanilla in every bite.
I love how versatile this little project is: kids can help shape the nests, decorating becomes part of the fun, and it’s quick enough to make while other dishes are in the oven. These never last long at our gatherings; the crunchy cereal, shiny chocolate center, and speckled mini eggs somehow trigger memories of childhood holidays for everyone. If you’re new to marshmallow treats, this is a forgiving recipe: little tweaks in technique still produce excellent results, and the visual payoff is immediate — perfect for gifting, school parties, or a cheerful dessert tray.
Why You'll Love This Recipe
- Ready in about 30 minutes from start to finish, including chilling time, which makes it ideal for last-minute entertaining and school bake sales.
- Uses pantry staples — puffed rice cereal, marshmallows, butter, chocolate — so you rarely need a trip to the store.
- Kid-friendly assembly: shaping and decorating double as a hands-on activity that keeps little helpers engaged.
- Customizable: swap chocolate types, use different candies, or add a drizzle for an elevated finish.
- Make-ahead friendly: nests keep well in an airtight container for a few days and freeze nicely for up to 1 month.
- Minimal equipment required — just a microwave or double boiler, a bowl, and a baking sheet — perfect for small kitchens.
Personally, I’ve found that the combination of a buttery marshmallow base and a glossy chocolate pool makes these nests feel both homemade and slightly luxe. At my rainy Easter, every child clutched a nest like a tiny treasure, and more than a few adults went back for seconds. The ritual of pressing your thumb to create the nest center is simple but oddly satisfying — it’s one of those small, tactile steps that helps even reluctant cooks feel productive.
Ingredients
- Puffed rice cereal (6 cups): Look for plain puffed rice such as Rice Krispies or a generic equivalent. Freshness counts — the cereal should be crisp with no stale aroma. This cereal provides the delicate crunch and airy structure that define the nests.
- Unsalted butter (1/4 cup): Use real butter for flavor control; unsalted lets you manage sodium. If you prefer, substitute with an equal amount of coconut oil for a dairy-free version (see substitutions below).
- Mini marshmallows (10 ounces): Mini marshmallows melt quickly and give a smooth, glossy coating. Standard bags are convenient; be aware that most marshmallows contain gelatin and are not suitable for vegetarian or vegan diets unless labeled otherwise.
- Vanilla extract (1 teaspoon): Pure vanilla extract adds depth and warms the sweetness. I recommend a good-quality extract — it’s a small amount but noticeable in the finished nests.
- Chocolate chips (1 cup): Choose milk chocolate or semi-sweet depending on your sweetness preference. Chocolate chips are easy to melt, and adding a tablespoon of vegetable or coconut oil gives the melted chocolate a glossy finish and easier drizzling.
- Vegetable or coconut oil (1 tablespoon): A small amount of neutral oil thins the melted chocolate for smooth spreading and helps it set with a shine.
- Mini candy eggs: Cadbury Mini Eggs, pastel-coated chocolate eggs, or jelly beans all work. Use 2–3 eggs per nest for a classic look. Check candy labels if allergies are a concern.
Instructions
Prepare Your Workspace: Line a baking sheet with parchment paper or wax paper and lightly grease your hands or a spoon with butter or cooking spray. Having everything ready — a greased spatula, measuring cups, and candy nearby — speeds the process. A chilled baking sheet will help the nests set faster once formed; set it in the fridge if you have space. Melt Butter and Marshmallows: In a large microwave-safe bowl, combine the butter and mini marshmallows. Microwave on high for 1 minute, stir, then continue in 30-second bursts stirring between intervals until the marshmallows are fully melted and smooth. Total time is usually 2–3 minutes depending on your microwave. Avoid overheating; marshmallows can scorch — if you see brown spots, reduce power next time. Stir in Vanilla: Once smooth, stir in the vanilla extract. The vanilla acts as a flavor anchor, cutting through the sweetness and adding a warm, aromatic note. Make sure it’s fully incorporated before adding cereal so it disperses evenly. Combine with Cereal: Add the puffed rice cereal to the marshmallow mixture. Using a buttered spatula or spoon, gently fold the cereal until evenly coated. Work swiftly while the mixture is warm; this ensures everything binds without crushing the cereal. If it cools and becomes sticky to handle, briefly microwave for 10–15 seconds to soften. Form the Nests: While warm, scoop about 1/4 cup of the mixture into greased hands, gently shape into a round, and press your thumb into the center to form the nest indentation. Place each nest on the prepared baking sheet. Aim for uniform size so they set evenly; a small cookie scoop helps with consistency. Chill the Nests: Refrigerate the baking sheet with the formed nests for about 15 minutes to help them firm up. This makes them easier to decorate and prevents the chocolate from sinking into a warm base. If you’re in a hurry, pop them in the freezer for 5–8 minutes, but watch closely so they don’t become brittle. Melt the Chocolate: Melt chocolate chips in a microwave-safe bowl in 30-second intervals, stirring until smooth, or melt over a double boiler. Stir in the vegetable or coconut oil until glossy. The oil thins the chocolate for a clean fill and helps it set with a shiny surface. Decorate and Finish: When nests are firm, spoon or pipe a small amount of melted chocolate into the center of each one, then immediately press 2–3 mini candy eggs into the chocolate before it sets. Let the chocolate harden at room temperature or chill briefly until set. Store in an airtight container.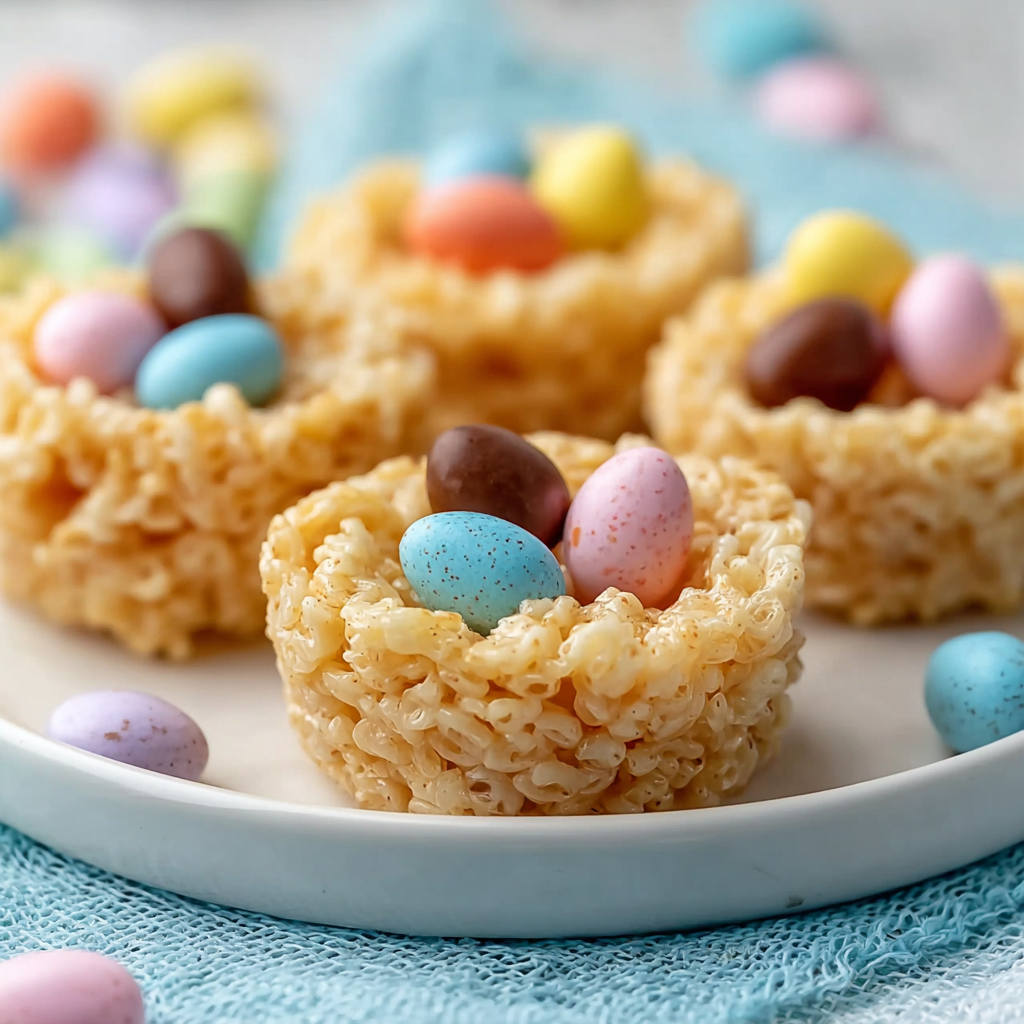
You Must Know
- These treats are best eaten within 3 days for maximum crunch; store in an airtight container at room temperature to keep the cereal crisp.
- They freeze well: layer with parchment between nests in a freezer-safe container for up to 1 month; thaw at room temperature for 30 minutes before serving.
- Marshmallows contain gelatin and some candies may contain traces of nuts or dairy — always check labels for allergies.
- A little oil in melted chocolate gives it a glossy finish and prevents cracking when bitten into.
What I enjoy most is how these nests turn a handful of everyday ingredients into something that looks like it took hours. The family always oohs when I place a tray on the table, and I’ve learned the small details — like using fresh cereal and not overheating marshmallows — are what keep texture and flavor balanced. Shaping nests is a great way to include kids in the kitchen without worrying about sharp tools or complex timings.
Storage Tips
Store finished nests in a single layer in an airtight container at room temperature for up to three days to keep the cereal crisp. If you must stack them, place a sheet of parchment between layers. For longer storage, freeze nests in a freezer-safe container for up to 1 month; thaw at room temperature for 20–30 minutes before serving to avoid condensation marring the chocolate surface. Avoid refrigeration unless your house is very warm, as refrigeration can cause the cereal to lose some of its crunch due to humidity.
Ingredient Substitutions
If you need a dairy-free option, substitute the butter with melted coconut oil and choose dairy-free chocolate chips. For vegetarian or vegan diets, use vegan marshmallows (made without gelatin) and vegan candy eggs or dried fruit like chopped apricots. If you prefer a less sweet version, use semi-sweet chocolate or dark chocolate for the center and consider using a lower-sugar cereal. Keep in mind that swaps may change texture slightly — coconut oil will lend a faint coconut aroma, while vegan marshmallows sometimes melt a bit differently, so adjust melting times accordingly.
Serving Suggestions
Serve nests on a simple platter lined with pastel napkins for Easter brunch or arrange them in cupcake liners for a kid-friendly grab-and-go display. They pair beautifully with a citrusy tea or a lightly roasted coffee to balance sweetness. For a dessert board, include small bowls of extra candy eggs, sprinkles, and melted chocolate for guests to personalize their nests. Garnish with edible flowers or a dusting of powdered sugar for a springtime presentation that looks elegant but takes minutes to achieve.
Cultural Background
These nests are a playful, modern take on marshmallow cereal treats that trace their roots to mid-20th-century American kitchen convenience cooking. Adapting the classic bar into a small nest filled with candy draws on Easter’s tradition of bird’s nests and eggs as springtime symbols of new life. Over time, this whimsical presentation has become a staple in home baking for school holidays and community events, blending nostalgic flavors with seasonal motifs.
Seasonal Adaptations
Transform the basic approach for other seasons: swap pastel candies for candy corn in autumn, red-and-green M&Ms for holiday parties, or small chocolate hearts for Valentine’s Day. Flavor the marshmallow mix with a teaspoon of almond extract for a spring almond note, or stir in a tablespoon of finely grated orange zest for a citrus twist. For a Halloween version, add a drop of gel food coloring to give the marshmallow mixture a spooky hue before shaping.
Meal Prep Tips
To make these ahead for a party, form and cool the nests, then store them in a single layer wrapped with parchment in a sturdy container for up to three days. If decorating on the day of the event, melt the chocolate and fill centers just before serving so the candy eggs look fresh. For bulk production, use a 1/4-cup cookie scoop to speed forming and work with one baking sheet in the fridge while you shape the rest. Keeping a damp towel nearby helps prevent sticky hands from slowing you down.
These easy nests are more than a quick sweet — they’re a small ritual that brings people together. Whether you make them with children, for neighbors, or to tuck into lunchboxes, they deliver joyful color and crunch with minimal fuss. Enjoy shaping, sharing, and making this simple tradition your own.
Pro Tips
Grease your hands or a small cookie scoop with butter to prevent sticking when forming nests.
Add 1 tablespoon of oil to melted chocolate for a glossy finish and easier drizzling.
Work quickly while the marshmallow mixture is warm to avoid crushing the cereal and to ensure good binding.
Chill the baking sheet ahead of time to help nests set faster once formed.
Use a 1/4-cup scoop for uniform nests and consistent chilling times.
This nourishing easy easter rice krispie nests recipe is sure to be a staple in your kitchen. Enjoy every moist, high protein slice — it is perfect for breakfast or as a wholesome snack any time.
FAQs about Recipes
Can I form the nests ahead of time?
Yes — shape the nests while the mixture is warm. If the mixture cools and becomes hard to shape, microwave it for 10–15 seconds to soften.
How long do the nests keep?
Yes. Store in an airtight container at room temperature for up to 3 days. Freeze up to 1 month.
Tags
Easy Easter Rice Krispie Nests
This Easy Easter Rice Krispie Nests recipe makes perfectly juicy, tender, and flavorful steak every time! Serve with potatoes and a side salad for an unforgettable dinner in under 30 minutes.
Ingredients
Main
Chocolate & Toppings
Instructions
Prepare Your Workspace
Line a baking sheet with parchment or wax paper and lightly grease your hands or a spoon with butter or cooking spray to prevent sticking. Gather measuring tools and candy so assembly is efficient.
Melt Butter and Marshmallows
In a large microwave-safe bowl, combine butter and mini marshmallows. Microwave 1 minute, stir, then microwave in 30-second intervals, stirring between each, until smooth (about 2–3 minutes total). Avoid scorching.
Stir in Vanilla
Stir 1 teaspoon vanilla extract into the melted marshmallow mixture until fully incorporated to add depth of flavor.
Combine with Cereal
Add 6 cups puffed rice cereal and gently fold with a buttered spatula until cereal is evenly coated, being careful not to crush the pieces.
Form the Nests
While warm, scoop about 1/4 cup portions and shape into rounds, pressing a thumb into the center to form an indentation. Place on prepared baking sheet.
Chill the Nests
Refrigerate the baking sheet for about 15 minutes or freeze 5–8 minutes to firm the nests for easier decorating.
Melt the Chocolate
Melt 1 cup chocolate chips in a microwave in 30-second bursts or over a double boiler. Stir in 1 tablespoon oil until smooth and glossy.
Decorate and Finish
Fill the center of each firm nest with a small spoonful of melted chocolate and immediately place 2–3 mini candy eggs into the chocolate. Let set at room temperature or chill briefly until firm.
Last Step: Please leave a rating and comment letting us know how you liked this recipe! This helps our business to thrive and continue providing free, high-quality recipes for you.
Nutrition
Did You Make This?
Leave a comment & rating below or tag
@aiolirecipe on social media!
Categories:
You might also like...

Fall Harvest Pasta Salad
A cozy, colorful salad that celebrates autumn flavors — roasted butternut squash and Brussels sprouts tossed with pasta, cranberries, pecans, and tangy feta, finished with a balsamic vinaigrette.

Cilantro Lime Steak Bowls
Bright, tangy cilantro-lime marinated flank steak served over rice with black beans, corn, fresh veggies and creamy avocado for a fast, healthy weeknight bowl.

Pecan Pie Crescent Rolls
Buttery crescent rolls filled with a sweet pecan pie–inspired filling — a quick, crowd-pleasing dessert perfect for holidays or weeknight cravings.
Did You Make This?
Leave a comment & rating below or tag @aiolirecipe on social media!
Rate This Recipe
Share This Recipe
Enjoyed this recipe? Share it with friends and family, and don't forget to leave a review!
Comments (1)
This recipe looks amazing! Can't wait to try it.
Comments are stored locally in your browser. Server comments are displayed alongside your local comments.
Hi, I'm Olivia!
What's Popular

30-Minute Meals!
Join to receive our email series which contains a round-up of some of our quick and easy family favorite recipes.