
>>

Crispy on the outside and ooey gooey on the inside, these pepperoni pizza roll-ups are quick to make and perfect for snacks, lunch, or game day.
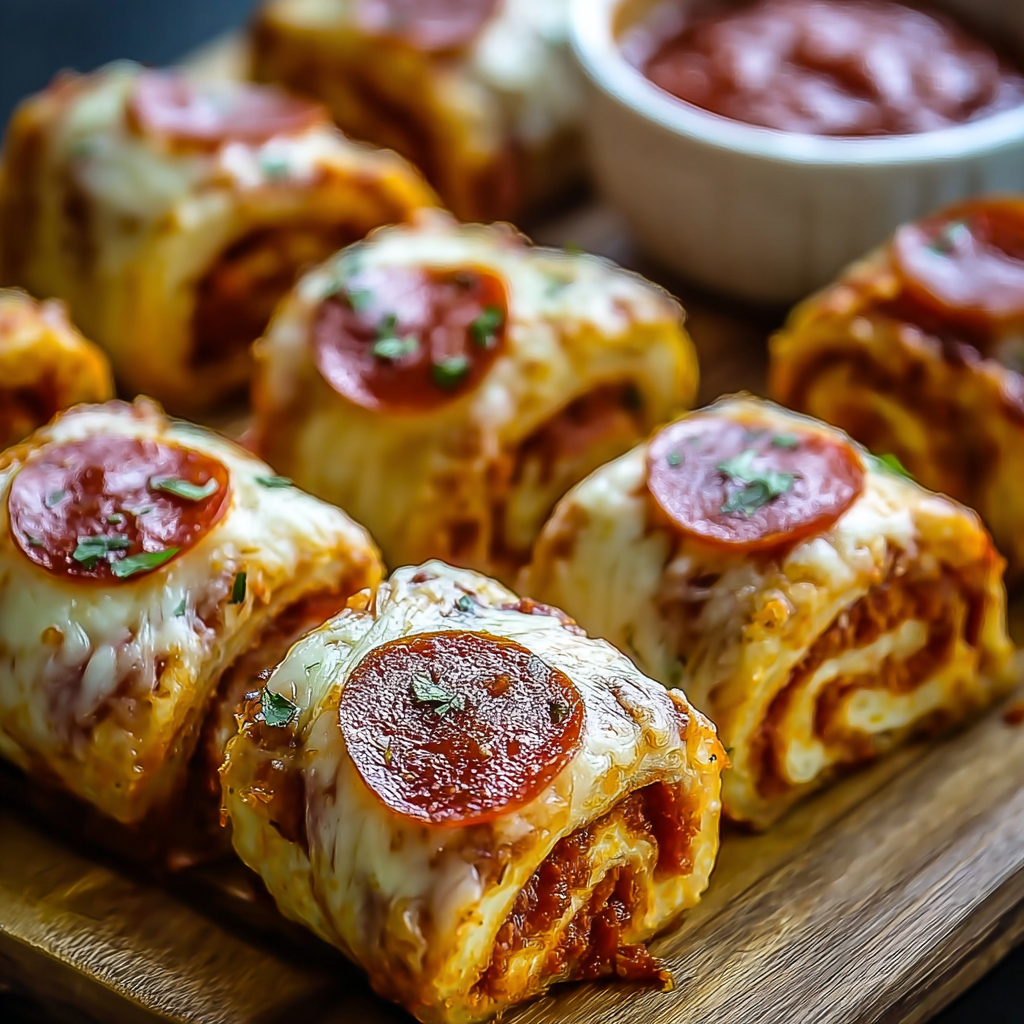
This recipe for Cheesy Pepperoni Pizza Roll-Ups is one of those weeknight heroes that started as a way to use up leftover tortillas and ended up as a family favorite. I discovered this combination on a busy evening when I needed to get dinner on the table fast. The result was a warm, comforting snack that tastes like pizza but eats like a handheld treat. The golden tortillas give way to molten mozzarella and the familiar spicy notes of pepperoni, and that contrast between crisp exterior and melty interior is what keeps everyone coming back for more.
I first made these roll-ups for a casual movie night and watched them disappear before the opening credits finished. They are forgiving, easy to customize, and quick to prepare. The assembly is intuitive, so cooks at any skill level can make them look and taste professional. The seasoning blend of garlic powder, Italian seasoning, and garlic salt adds a final aromatic lift that makes the flavors sing. If you are looking for a simple, crowd pleasing recipe that can be ready in under 30 minutes, these roll-ups will become a staple in your collection.
I remember the first time I made a double batch because my sister asked for seconds and thirds. The leftovers reheated beautifully the next day which made them perfect for meal prep. Friends often ask for the simple seasoning mix that finishes the roll-ups. That little sprinkle changes the entire aroma profile and gives a restaurant quality touch at home.

My favorite thing about this recipe is its adaptability. I have made these for kids who prefer plain fillings and for adults who like extra heat. One holiday brunch turned into a friendly competition to come up with the most creative add ins. Those evenings remind me that simple food served with warmth creates the best memories.

Allow the roll-ups to cool to room temperature before storing. Place them in an airtight container in the refrigerator for up to 4 days. For longer storage, freeze unbaked roll-ups on a tray until firm, then transfer to a freezer bag for up to 3 months. To reheat frozen roll-ups, bake at 375 degrees Fahrenheit for about 18 to 22 minutes from frozen until heated through and golden. Use aluminum foil for reheating if you want a softer exterior, or bake uncovered for a crispier crust. Label the containers with dates to keep track of freshness.
Swap the flour tortillas for whole wheat or gluten free tortillas to meet dietary needs. Replace mozzarella with dairy free shredded cheese for a lactose free version. Use turkey pepperoni or thinly sliced cooked chicken for a leaner protein option. If pizza sauce is not available, use marinara or a mixture of crushed tomatoes with a pinch of dried oregano. When substituting ingredients, keep proportions similar to maintain texture. For example, if using a thicker sauce, use slightly less to avoid soggy tortillas.
Serve warm alongside a crisp salad or a small bowl of extra pizza sauce for dipping. Add a drizzle of balsamic glaze for a gourmet twist. Garnish with chopped fresh basil or a light sprinkle of Parmesan for color and complexity. These roll-ups are ideal for casual gatherings, packed lunches, or as appetizers for a game day table. Pair with roasted vegetables or a light soup to make a complete meal. For a party, cut each roll-up in half and skewer with a toothpick for easy serving.
The idea of wrapping pizza ingredients in a thin bread dates back to hand held adaptations of classic Italian pies. Similar concepts appear in calzones and stromboli, which were invented as portable variations of pizza. This roll-up style borrows Italian flavors but translates them into an American friendly form that emphasizes convenience. Over the years, cooks have adapted these handheld formats to include a wide range of fillings and regional spices, turning a simple approach into countless variations enjoyed across family kitchens.
In summer, add fresh tomatoes and basil to brighten the fillings. In autumn, incorporate roasted bell peppers and caramelized onions for a deeper flavor. During the holidays, use fennel spiced sausage instead of pepperoni for a festive twist. Swap cheeses with smoked varieties for a winter version that pairs well with darker beers. Small seasonal swaps keep the recipe feeling fresh throughout the year while letting local produce shine.
Assemble roll-ups ahead of time and place them on a parchment lined tray, covered, in the refrigerator for up to 24 hours. For freezer meal prep, flash freeze the assembled roll-ups on a tray until solid, then store them in a labeled freezer bag. When using frozen roll-ups for meal prep meals, bake straight from frozen and add a few extra minutes of cook time. Pack cooled roll-ups in microwave safe containers with a small cup of sauce for dipping. Use insulated lunch gear to keep them warm until lunchtime.
These roll-ups are an easy way to bring people together. They are fast, adaptable, and full of comforting flavors. Try them with your favorite toppings and enjoy the smiles that follow.
Warm tortillas briefly in the microwave for 10 seconds to make them more pliable for rolling.
Use fresh shredded mozzarella for the best melt and texture rather than pre shredded cheese.
To prevent soggy edges, leave a 1/2 inch border of tortilla without sauce before rolling.
If making ahead, assemble and refrigerate for up to 24 hours before baking to maintain texture.
This nourishing cheesy pepperoni pizza roll-ups recipe is sure to be a staple in your kitchen. Enjoy every moist, high protein slice — it is perfect for breakfast or as a wholesome snack any time.
This Cheesy Pepperoni Pizza Roll-Ups recipe makes perfectly juicy, tender, and flavorful steak every time! Serve with potatoes and a side salad for an unforgettable dinner in under 30 minutes.
Preheat oven to 350 degrees Fahrenheit. Lightly spray or oil a large baking pan to prevent sticking.
Lay each tortilla flat and spread about 1 tablespoon of pizza sauce evenly, leaving a 1/2 inch border so the sauce does not squeeze out during rolling.
Sprinkle about 1/4 cup shredded mozzarella per tortilla then place 4 slices of pepperoni evenly over the cheese.
Tightly roll each tortilla and place seam side down in the prepared pan to keep rolls from unrolling while baking.
Lightly brush the tops with cooking oil. Mix garlic powder, Italian seasoning, and garlic salt, then sprinkle evenly over the roll ups.
Bake at 350 degrees Fahrenheit for about 10 minutes until cheese is melted. For a crispier exterior, increase oven to 400 degrees for an additional 5 to 8 minutes or use an air fryer at 400 degrees for 5 to 8 minutes.
Last Step: Please leave a rating and comment letting us know how you liked this recipe! This helps our business to thrive and continue providing free, high-quality recipes for you.
Leave a comment & rating below or tag
@aiolirecipe on social media!

A cozy, colorful salad that celebrates autumn flavors — roasted butternut squash and Brussels sprouts tossed with pasta, cranberries, pecans, and tangy feta, finished with a balsamic vinaigrette.

Bright, tangy cilantro-lime marinated flank steak served over rice with black beans, corn, fresh veggies and creamy avocado for a fast, healthy weeknight bowl.

Buttery crescent rolls filled with a sweet pecan pie–inspired filling — a quick, crowd-pleasing dessert perfect for holidays or weeknight cravings.
Leave a comment & rating below or tag @aiolirecipe on social media!
Enjoyed this recipe? Share it with friends and family, and don't forget to leave a review!
This recipe looks amazing! Can't wait to try it.
Comments are stored locally in your browser. Server comments are displayed alongside your local comments.
Join to receive our email series which contains a round-up of some of our quick and easy family favorite recipes.
